
Disclosure: Renovation Guide HQ publishes free, independent home improvement guides. We do not earn commissions from the products or services mentioned in this guide, and we have no affiliate relationships.
By Renovation Guide HQ · Updated October 25, 2026
Quick Answer
Painting a standard 12 by 12 room yourself costs roughly 150 to 250 dollars in supplies (planning estimate) and takes one weekend. A professional charges about 500 to 1,200 dollars (planning estimate) for the same room. The difference is rarely the paint — it is the prep, the order of operations, and two patient coats.
This guide walks you through the full process, from calculating how much paint to buy to cutting in razor-sharp lines. If you want the cost picture first, start with our interior painting cost per square foot guide, then come back here for the technique.
What Painting a Room Costs
| Option | Total Cost | Timeline |
|---|---|---|
| DIY, one room (walls only) | 150 to 250 dollars (planning estimate) | 1 weekend |
| DIY, walls plus ceiling and trim | 200 to 350 dollars (planning estimate) | 1 weekend plus an evening |
| Professional, walls only | 500 to 1,200 dollars (planning estimate) | 1 to 2 days |
| Professional, walls plus ceiling and trim | 800 to 1,800 dollars (planning estimate) | 2 to 3 days |
For a professional job, labor typically makes up 70 to 85 percent of the total, with paint and materials accounting for the rest (planning estimate). For a DIY job, the split flips: paint is the biggest line item, followed by brushes, rollers, and tape.
How Much Paint Do You Actually Need?
One gallon of interior latex paint covers about 350 square feet per coat on smooth, primed walls (planning estimate). The formula is simple:
Wall area = room perimeter × ceiling height, minus doors and windows. A standard door is about 21 square feet and a standard window about 15 square feet. Multiply by two coats, divide by 350, and round up to the next full gallon. Running out mid-wall leaves a visible lap mark where the new paint overlaps the dried edge.
Buy all your paint at once, and if you buy more than one gallon, mix them together in a 5-gallon bucket (called boxing) so the color is identical across every wall. Keep one quart labeled with the room name and date for touch-ups.
Worked Budget Example: A 12 by 12 Foot Bedroom
A 12 by 12 foot bedroom with 8-foot ceilings has a wall perimeter of 48 feet, or 384 square feet of wall. Subtract one door (21 square feet) and two windows (30 square feet) and you get 333 square feet of paintable wall. Two coats means covering 666 square feet, which at 350 square feet per gallon calls for 2 gallons.
| Item | Cost (planning estimate) |
|---|---|
| Wall paint, 2 gallons at 45 dollars | 90 dollars |
| Primer, 1 gallon (patches and color change) | 25 dollars |
| 2.5-inch angled brush | 15 dollars |
| Roller frame, extension pole, 2 covers | 20 dollars |
| Painter’s tape, 1 roll | 8 dollars |
| Paint tray and liners | 8 dollars |
| Drop cloth | 15 dollars |
| Spackle, sandpaper, tack cloth | 10 dollars |
| Paintable caulk | 6 dollars |
| Total | 197 dollars |
Reusable tools (brush, roller frame, pole, tray) carry over to the next room, so your second room costs roughly 130 to 150 dollars (planning estimate) — mostly just paint and tape.
What 150, 300, and 900 Dollars Actually Buy
150 dollars buys a solid DIY refresh of one bedroom: mid-range paint, one good brush, a roller kit, tape, and a drop cloth. Walls only, no ceiling, no trim work.
300 dollars buys walls plus ceiling and trim in that same room, with premium paint, a second brush for trim, and enough primer for a real color change.
900 dollars buys a professional crew painting that room start to finish — prep, patching, caulking, two coats on walls, ceiling, and trim — in about two days, with a warranty on the workmanship.
Regional Differences
Professional painting labor varies by region, and the numbers below are illustrative planning estimates, not quotes. Expect the highest labor rates in the Northeast and on the West Coast, mid-range rates in the Midwest, and the lowest in the South and rural areas. In high-cost metros, a pro room repaint can run 30 to 50 percent above the national range; in smaller markets it can run 20 to 30 percent below. Paint itself costs roughly the same everywhere, so DIY budgets barely move by region. Get three local quotes — that is the only number that matters for your zip code.
7 Cost Factors, and What Each One Adds
- Room size and ceiling height. A room with 10-foot ceilings has 25 percent more wall area than the same room with 8-foot ceilings, and vaulted ceilings add ladder or scaffold time. Impact: 50 to 200 dollars (planning estimate).
- Color change. Going from dark to light (or light to dark) usually needs a primer coat plus two finish coats instead of two coats total. Impact: one extra gallon plus half a day, about 50 to 90 dollars DIY (planning estimate).
- Wall condition. Cracks, dents, nail pops, and peeling paint all need patching, sanding, and sometimes skim-coating before paint goes on. Impact: 50 to 300 dollars (planning estimate).
- Trim and doors. Painting baseboards, window casings, and doors is slow, detailed brush work. Impact: 100 to 400 dollars per room professionally (planning estimate).
- Ceilings. Ceiling paint is a separate product and overhead rolling is slower. Impact: 30 to 60 dollars DIY, 150 to 300 dollars pro (planning estimate).
- Paint quality. Budget paint runs about 25 to 35 dollars per gallon; premium paint runs 55 to 85 dollars (planning estimate). Premium paint often covers better, which can save a whole coat.
- Prep scope. Pros spend 50 to 70 percent of job time on prep. A quote that skips prep will look cheap and age badly — peeling and uneven sheen show up within a year or two.
DIY vs. Hiring a Pro
| Factor | DIY | Professional |
|---|---|---|
| Cost per room | 150 to 350 dollars (planning estimate) | 500 to 1,800 dollars (planning estimate) |
| Skill level (1 to 5) | 2 for walls, 4 for clean trim lines | Not your problem |
| Tools needed | Brush, roller, pole, tape, ladder, drop cloths | Included |
| Time | 1 weekend per room | 1 to 3 days per room |
| Savings | 300 to 1,000 dollars per room (planning estimate) | None, but warranty included |
DIY makes sense for bedrooms, living rooms, and hallways in good condition. Hire out tall stairwells, vaulted ceilings, extensive damage repair, and any home built before 1978 where lead paint may be present (see Permits and Safety below). Painting itself needs no license in most states, but lead-safe work does require EPA certification.
Step-by-Step: How to Paint a Room
Step 1: Clear and protect the room (45 to 60 minutes). Remove wall hangings, curtains, and outlet and switch covers. Move furniture to the center and cover it with plastic or drop cloths. Lay canvas drop cloths on the floor — plastic sheeting is slippery underfoot.
Step 2: Patch and sand (1 to 2 hours, plus drying). Fill nail holes and small dents with lightweight spackle; use joint compound for larger holes, applied in two thin coats rather than one thick one. Let it dry completely, sand flush with 120-grit then 220-grit sandpaper, and wipe dust away with a damp cloth or tack cloth.
Step 3: Clean the walls (30 minutes). Wash with a TSP substitute solution, rinse with clean water, and let the walls dry fully. In kitchens, this step is non-negotiable: cooking grease blocks paint adhesion. Never use a cleaner that leaves wax or oil behind.
Step 4: Caulk and tape (45 to 60 minutes). Run paintable caulk along gaps between trim and wall, smooth it with a wet finger, and let it dry. Apply painter’s tape along the ceiling line, trim, and window and door casings. Press the tape edge down hard with a putty knife or credit card — a loose edge is how paint bleeds underneath and leaves a jagged line. For an extra-crisp line, brush a thin coat of the existing wall color over the tape edge first; it seals any gaps, and then your new color cannot bleed through.
Step 5: Prime where needed (1 hour, plus drying). Prime bare drywall, fresh patches, stains, and any dramatic color change. Skip primer only when the wall is in good condition and the new color is close to the old one. Let primer dry fully before topcoating — check the can, not the clock.
Step 6: Cut in the edges (45 to 90 minutes per coat). Using a 2.5-inch angled brush, paint a 2- to 3-inch band along the ceiling line, corners, and around trim. Dip only the bottom third of the bristles, tap (do not wipe) off the excess, and work in 3-foot sections. Start a couple of inches from the edge, brush toward it, and slow down as you approach the line. Cut in one wall at a time, then roll it immediately while the cut-in paint is still wet — this keeps a wet edge and prevents a visible border, sometimes called picture framing.
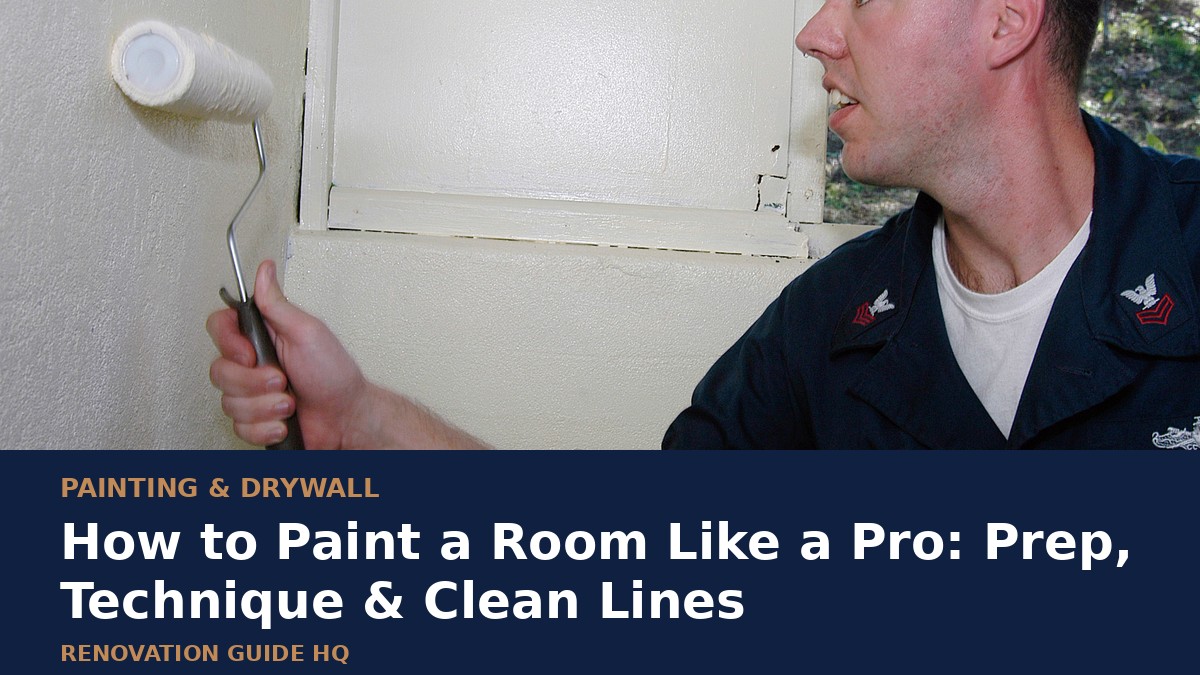
Step 7: Roll the walls (30 to 45 minutes per coat). Load the roller evenly, roll off the excess on the tray’s ribbed section, and apply paint in a large W or M pattern about 3 feet square. Fill in the W without lifting the roller, then finish with light top-to-bottom strokes to even out the finish. Overlap each section into the wet edge of the last one. Do not press hard — pressure squeezes paint out and leaves roller marks.
Step 8: Second coat (after full drying, 2 to 4 hours later). Two coats are the standard for even, opaque coverage. The first coat always looks patchy; the second coat is where the finish comes together. If you are covering a dark color with a light one, a third coat may be needed.
Step 9: Remove tape and inspect (30 minutes). Pull tape slowly at a 45-degree angle while the final coat is still slightly tacky — waiting until it is fully dry can tear the paint film. Inspect with a bright light held parallel to the wall to catch missed spots (called holidays) and drips, and touch them up with a small brush.
Step 10: Clean up and reassemble (45 minutes). Wash latex brushes and rollers with soap and warm water until the water runs clear. Wait at least 24 hours before reinstalling outlet covers and moving furniture back against the walls.
Materials and Tools List
Materials: interior latex paint (2 gallons for a 12 by 12 room), primer (1 gallon if needed), painter’s tape, lightweight spackle, joint compound for larger repairs, paintable caulk, drop cloths, plastic sheeting for furniture.
Tools: 2.5-inch angled sash brush, 9-inch roller frame and extension pole, 3/8-inch nap roller covers, paint tray with liners, 5-gallon bucket for boxing paint, 120-grit and 220-grit sandpaper, putty knife, tack cloth, step ladder, bright work light, stir sticks.
Choosing a finish: flat or matte for ceilings and low-traffic rooms, eggshell for living rooms and bedrooms, satin for kitchens, bathrooms, and hallways, and semi-gloss for trim and doors. Higher sheen shows wall flaws more, so never use satin or semi-gloss on unprepped walls.
9 Mistakes That Ruin an Otherwise Good Paint Job
- Skipping prep. Paint magnifies every bump, hole, and dust speck underneath it. Prep is the job; painting is the reward.
- Painting over grease or dust. The paint will peel or fisheye. Wash first, always.
- Letting the cut-in dry before rolling. The result is a visible frame around every wall. Cut in one wall, roll it, move on.
- Overloading the brush or roller. Drips, sags, and thick edges all come from too much paint on the tool. Two thin coats beat one thick one.
- Using cheap tape, or not pressing it down. Bleed-through lines are almost always a tape adhesion failure, not a brush failure.
- Pulling tape after the paint fully dries. The film tears and takes paint with it. Pull while tacky, at 45 degrees.
- Skipping primer on patches and color changes. Patches flash through as dull spots, and dark colors ghost through light ones.
- Painting in a cold or humid room. Latex paint needs roughly 50 to 85 degrees Fahrenheit and moderate humidity to cure properly. Cold, damp air stretches drying time and weakens adhesion.
- Buying paint before testing the color. A sample quart on the actual wall, viewed in daylight and evening light, prevents a whole-room regret.
Permits and Safety
Repainting interior walls is cosmetic work and does not require a building permit in the United States. Two safety rules do apply. First, if your home was built before 1978, assume lead paint may be present: do not sand or scrape it without following the EPA Renovation, Repair and Painting (RRP) lead-safe rules, and hire an EPA-certified firm for any work that disturbs painted surfaces. Second, if your home was built before 1980 and you plan to disturb wall materials (not just paint over them), have the material tested for asbestos first. For ordinary repainting, the main safety needs are ventilation (open windows, run a fan), a stable ladder, and keeping paint away from electrical outlets — remove the covers rather than painting around them.
Hiring a Contractor: 6 Questions, Red Flags, and License Checks
Ask these six questions:
- Does your quote include prep, patching, caulking, primer, and two finish coats — and is each itemized?
- What paint brand, product line, and sheen will you use, and how many coats are included?
- How will you protect floors, furniture, and fixtures, and who moves the furniture?
- What is the schedule — start date, daily hours, and completion date?
- Do you carry liability insurance and workers’ compensation, and can you show proof?
- What warranty do you offer on workmanship, and for how long?
Red flags: a quote far below the others (usually means skipped prep or one thin coat), no written contract, a demand for full payment upfront, no insurance, or pressure to decide on the spot. A reasonable deposit is 10 to 30 percent, with the balance due on completion.
License check: painting is unlicensed in many states but licensed in others (California, for example, requires a C-33 painting license). Search your state contractor license board’s website and verify the company’s name and license number before signing. Never take a contractor’s word for it.
Need help finding a reputable painter? Contact Renovation Guide HQ and tell us about your project.
Financing a Larger Painting Project
A single room is usually a cash project, but a whole-house repaint (2,000 to 8,000 dollars professionally, planning estimate) may justify financing. Common options, in general terms: a home equity line of credit (HELOC) or home equity loan, which borrow against your home’s equity; a cash-out refinance, which replaces your mortgage with a larger one; or a personal loan, which is unsecured and typically carries a higher rate. Each has different costs, risks, and tax treatment, and borrowing against your home puts the home itself at risk if you cannot repay. Compare total cost, not just the monthly payment, and get advice from a qualified financial professional before borrowing. This section is general information, not financial advice.
Frequently Asked Questions
How long does it take to paint a room?
A standard bedroom takes one weekend for a DIYer: roughly a day for prep and the first coat, and a second day for the second coat, tape removal, and cleanup. A professional crew finishes the same room in 1 to 2 days. Add a day for ceiling and trim work, and another for major repairs or a dramatic color change.
Do I need to prime before painting?
Prime bare drywall, fresh patches, stains, and dramatic color changes. If the wall is in good condition and the new color is close to the old one, a quality paint-and-primer-in-one applied in two coats is usually enough.
How do I get clean lines without tape?
Cut in with a steady hand: load a 2.5-inch angled brush lightly, rest your hand against the wall for stability, and pull long, slow strokes along the edge. Most beginners get better lines with tape, and the tape-sealing trick in Step 4 (a base-color coat over the tape edge) fixes most bleed problems.
Why does my paint look patchy after one coat?
One coat almost never provides full, even coverage — patchiness is normal at that stage. The second coat evens out color and sheen. If it is still patchy after two coats, the likely causes are skipped primer, a cheap roller cover, or painting over a dirty or glossy surface.
What is the best paint finish for a bedroom?
Eggshell is the most popular bedroom choice: it has a soft glow, hides minor wall flaws, and wipes clean better than flat paint. Use flat or matte on ceilings, and satin in kids’ rooms or high-traffic areas where washability matters more.
Should I paint the ceiling first or the walls first?
Ceiling first, then trim, then walls — top to bottom. Any ceiling drips land on unpainted walls, where the wall coats will cover them. If you paint walls first, ceiling drips become touch-up work.
Bottom Line
A pro-looking paint job is 70 percent preparation and 30 percent painting. Measure your walls, buy enough paint for two coats, patch and sand properly, tape carefully, cut in one wall at a time, and roll while the edge is wet. Do that, and a 200-dollar weekend project can genuinely look like a professional job. For related guides, see our interior painting cost guide, our 2026 interior paint colors guide, and our drywall installation cost guide.
Ready to get it done right? Get 3 quotes from local painters through Renovation Guide HQ — tell us your room size and timeline, and we will point you to reputable pros in your area.