Affiliate Disclosure: This guide contains zero affiliate links. If that ever changes, we will say so right here.
By Renovation Guide HQ · Updated October 15, 2026
Updated: October 2026
The Quick Answer: Vinyl Plank Flooring Cost in 2026
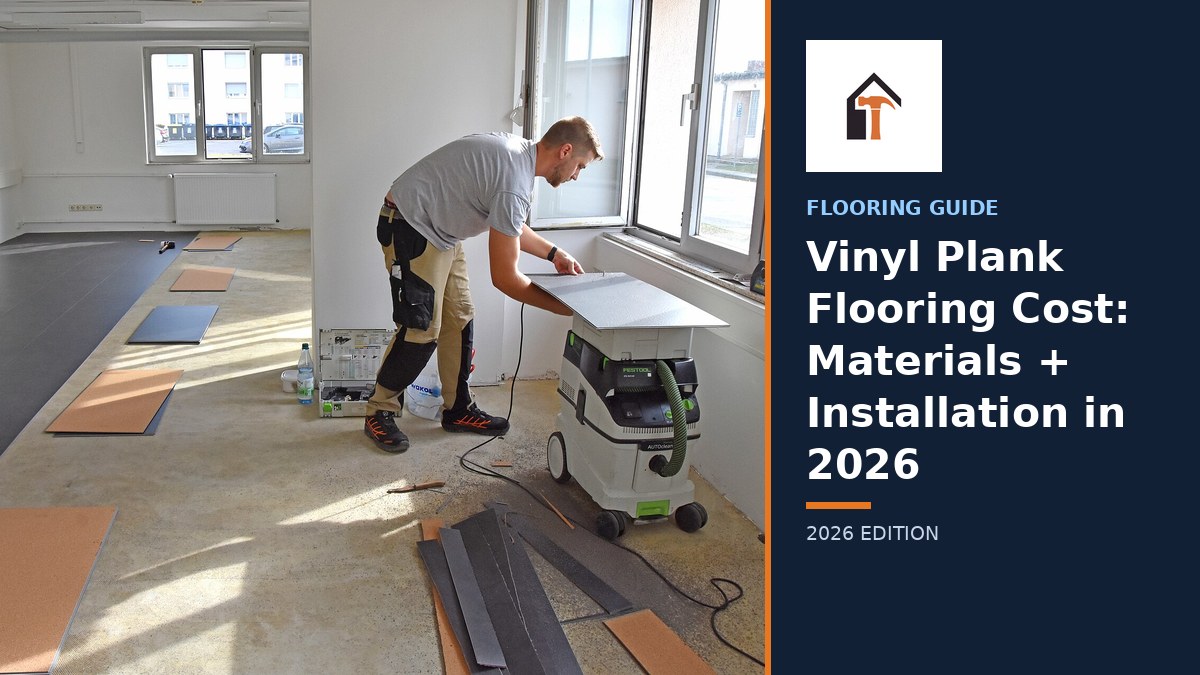
Vinyl plank flooring costs $3 to $10 per square foot installed in 2026, according to Best Flooring Honolulu’s 2026 pricing guide. A typical 600 sq ft living area runs $1,800 to $6,000 professionally installed, and a 1,000 sq ft whole-home project lands between $3,500 and $17,000. Most single rooms take 1 to 3 days to install.
If you are still choosing between floor types, start with our flooring cost per square foot guide — it benchmarks vinyl plank against hardwood, laminate, and tile so you can see where your money goes before you commit.
Vinyl Plank Flooring Cost Table: Low, Average, High
| Budget Tier | Cost Per Sq Ft (Installed) | Labor vs. Materials Split | Timeline (600 sq ft) |
|---|---|---|---|
| Low — budget flexible plank, floating install, minimal prep | $3–$5 | ~35% labor / ~65% materials | 1–2 days |
| Average — mid-range rigid-core LVP, click-lock, standard trims | $5–$8 | ~40% labor / ~60% materials | 2–3 days |
| High — premium wide-plank rigid core, glue-down, heavy prep or stairs | $8–$13+ | ~45% labor / ~55% materials | 3–5 days |
The tier ranges above come from NEDES Estimating’s 2026 breakdown, which attributes the budget tier to Fixr and D&G Flooring data, the mid-range tier to Carpet Exchange, and the premium tier to Forbes Home and HomeGuide. Labor shares are planning estimates: vinyl plank is a material-heavy job, so materials dominate the total unless subfloor prep or stairs drive labor up.
What You Pay for Materials vs. Labor Alone
| Component | Cost Per Sq Ft | Source |
|---|---|---|
| Standard vinyl plank materials | $2–$7 | Angi / This Old House, via NEDES |
| Luxury vinyl plank (LVP) materials | $3–$10 | Angi / This Old House, via NEDES |
| Entry-level plank materials | $1.50–$3.00 | Carpet Exchange / D&G Flooring, via NEDES |
| Rigid-core (SPC/WPC) materials | $6–$12+ | Today’s Homeowner, via NEDES |
| Installation labor, floating click-lock | $1.50–$4 | HomeAdvisor, via NEDES |
| Installation labor, all methods | $2–$4.50 | Floors Depot 2026 guide |
| Subfloor preparation / leveling | $1.50–$3.50 | Bhumi Calculator flooring guide |
| Existing floor removal | $1–$3 | Bhumi Calculator flooring guide |
Rule to live by: before comparing bids, confirm whether each price is labor-only or materials plus labor, and ask what is excluded — subfloor leveling, old-floor removal, transitions, stairs, and furniture moving are the five exclusions that generate change orders.
What $2,500 / $5,000 / $10,000 Actually Buys
$2,500 buys roughly 500 sq ft of budget vinyl plank installed by a pro at the low end of the range, or about 800 sq ft of budget plank if you install it yourself and skip labor. Expect thin flexible planks, a basic floating install, and standard transitions.
$5,000 covers roughly 700 sq ft of mid-range rigid-core LVP professionally installed, including light subfloor prep and new transitions. This is the most common real-home scenario: one main living area plus a hallway, done right.
$10,000 funds roughly 1,200 sq ft of premium wide-plank rigid core with professional installation, full subfloor leveling, old-floor removal, and a stair run. At this budget you are buying the thickest wear layers, the most realistic wood looks, and a floor that tolerates kids, dogs, and daily traffic.
Worked Budget Example: 600 Sq Ft Living Room (Mid-Range SPC Click-Lock)
Every line item below adds up. Read it as a checklist for what your bid should itemize — if a contractor’s quote skips any of these lines, ask where the cost hides.
| Line Item | Math | Cost |
|---|---|---|
| SPC rigid-core planks, 20-mil wear layer (600 sq ft + 10% waste = 660 sq ft) | 660 × $4.00 | $2,640 |
| Floating click-lock installation labor | 600 × $2.50 | $1,500 |
| Moisture barrier / underlayment | 600 × $0.50 | $300 |
| Old carpet removal + disposal | 600 × $1.50 | $900 |
| Transitions + quarter-round trim (120 linear ft) | 120 × $2.50 | $300 |
| Subfloor leveling allowance | flat | $400 |
| Total | $6,040 |
That is $10.07 per sq ft all-in — above the $5–$8 mid-range installed band because removal and leveling are included. Strip out the old-carpet removal and the leveling allowance and the same 600 sq ft room drops to $4,740, or $7.90 per sq ft, right inside the mid-range band. Unit prices above are planning estimates inside the sourced ranges cited in this guide; your exact number comes from itemized bids.
Regional Cost Differences
Flooring labor follows local wage levels, not national averages. Here is how the U.S. breaks down (illustrative, based on regional project data):
- Northeast and West Coast metros (Boston, New York, San Francisco): typically 15–25% above the national average. Labor alone can reach $4–$5 per sq ft in high-cost markets (planning estimate).
- Midwest and South (Ohio, Texas, Carolinas): typically at or 10–15% below the national average, with rural labor as low as $1.50–$2.50 per sq ft (planning estimate).
- Mountain West (Denver, Phoenix): typically near the national average, with fast-growing markets trending 5–10% above it as installer demand outpaces supply (planning estimate).
Materials cost roughly the same everywhere thanks to national retail and online pricing. Labor is where your region shows up — always get three local bids before trusting a national average.
7 Cost Factors With Real Dollar Impact
1. Plank tier and wear layer: $1.50–$8 per sq ft of material swing
The wear layer is the clear top coat measured in mils. A 6-mil layer suits a spare bedroom; a 20-mil layer handles a busy family room; 28- to 40-mil layers are commercial-grade. Thicker wear layers cost more per box but are the single biggest predictor of how long the floor looks new. Entry planks run $1.50–$3.00 per sq ft while rigid-core planks run $6–$12+ per sq ft, per NEDES Estimating’s 2026 data.
2. Core type: SPC vs. WPC vs. flexible: $1–$4 per sq ft swing
SPC (stone plastic composite) is the densest, most dent-resistant core and the best choice over imperfect subfloors. WPC (wood plastic composite) is softer underfoot and quieter but dents more easily under heavy furniture. Flexible glue-down vinyl is cheapest and thinnest, and it telegraphs every subfloor bump. Expect SPC to cost $1–$4 per sq ft more than flexible vinyl in materials (planning estimate).
3. Installation method: $0.50–$3 per sq ft swing
Floating click-lock is the fastest and cheapest install because nothing is glued down. Glue-down installs cost more in labor and adhesive but hold tight in commercial spaces and on stairs. Loose-lay planks sit in the middle — quick to install, easy to replace one plank at a time. Glue-down labor can add $0.50–$3 per sq ft over floating (planning estimate).
4. Subfloor condition: $0–$3.50 per sq ft swing
Vinyl plank needs a flat subfloor — most manufacturers specify no more than 3/16 inch of deviation over 10 feet. Leveling compound, patching, and grinding run $1.50–$3.50 per sq ft where needed, per Bhumi Calculator’s flooring guide. A perfectly flat slab costs you nothing extra. A wavy old subfloor is the most common budget surprise.
5. Room complexity and layout: 10–15% more material, 25–50% more labor
Hallways, closets, doorways, kitchen islands, and angled walls all mean more cuts and more waste. Diagonal or herringbone layouts push waste from the standard 10% up to 15% or more, per NEDES Estimating. Complex layouts can raise labor costs by 25–50%, per Floors Depot’s 2026 guide.
6. Old-floor removal: $1–$3 per sq ft swing
Removing old carpet, laminate, or tile and hauling it away runs $1–$3 per sq ft, per Bhumi Calculator’s flooring guide. Some installers will float LVP over an existing flat floor, which saves the removal cost — but only if the old floor is level, firmly bonded, and the manufacturer allows it. Never float over cushioned sheet vinyl or a failing floor.
7. Stairs, transitions, and trim: $300–$1,500+ per project
Stairs are priced per step, transitions per piece, and quarter-round per linear foot. A single stair run can add several hundred dollars, and whole-home projects with many doorways add up fast. Get these itemized in the bid, not bundled into a vague per-sq-ft number (planning estimate).
DIY vs. Hiring a Pro
| DIY Floating Click-Lock | Professional Install | |
|---|---|---|
| Skill level (1–5) | 2–3: patient beginner to intermediate | Pro handles everything |
| Tools needed | Tape measure, utility knife or vinyl cutter, tapping block, pull bar, spacers, jigsaw or miter saw, level, knee pads | Included in the bid |
| Time (600 sq ft) | 2–4 days for a first-timer (planning estimate) | 1–2 days for a crew (planning estimate) |
| Cost | Materials + tools only; you save the $1.50–$4 per sq ft labor | $1.50–$4 per sq ft labor, plus any prep |
| Best for | Single flat rooms, click-lock planks, homeowners comfortable with a saw | Glue-down installs, stairs, whole-home projects, uneven subfloors |
When DIY is the wrong call: glue-down commercial installs, stairs, rooms with moisture problems, and any job where the subfloor needs major leveling. A bad subfloor prep job will show through vinyl within months, and most manufacturer warranties require installation to spec. Also note: if your project involves disturbing old flooring, paint, or trim in a pre-1978 home, lead-safe rules apply, and asbestos testing is smart for pre-1980 vinyl tile, sheet flooring, and mastic — see Permits and Safety below.
If you are weighing vinyl against real wood, compare the full picture in our hardwood floor installation cost guide — hardwood runs $6–$12 per sq ft installed and suits a different budget and timeline.
Step-by-Step: Installing Floating Vinyl Plank
- Measure and order (1–2 hours). Measure each room, multiply length by width, add 10% for waste (15% for diagonal layouts), and order. Buy all boxes from the same dye lot so the color matches.
- Acclimate the planks (24–48 hours). Stack unopened boxes flat in the room where they will be installed. Check the manufacturer’s acclimation window — skipping this step risks gaps and buckling.
- Prep the subfloor (2–8 hours). Remove old flooring if needed, sweep and vacuum, fill low spots with leveling compound, and grind down high spots. Verify flatness with a 10-foot straightedge.
- Install moisture barrier and underlayment (1–2 hours). Roll out the barrier or underlayment the manufacturer specifies. Many SPC planks have an attached pad — if yours does, skip separate underlayment unless the manufacturer requires it.
- Plan the layout (30–60 minutes). Dry-lay the first two rows. Stagger end joints by at least 6 inches, and avoid sliver cuts under 2 inches wide at the far wall by shifting the starting row.
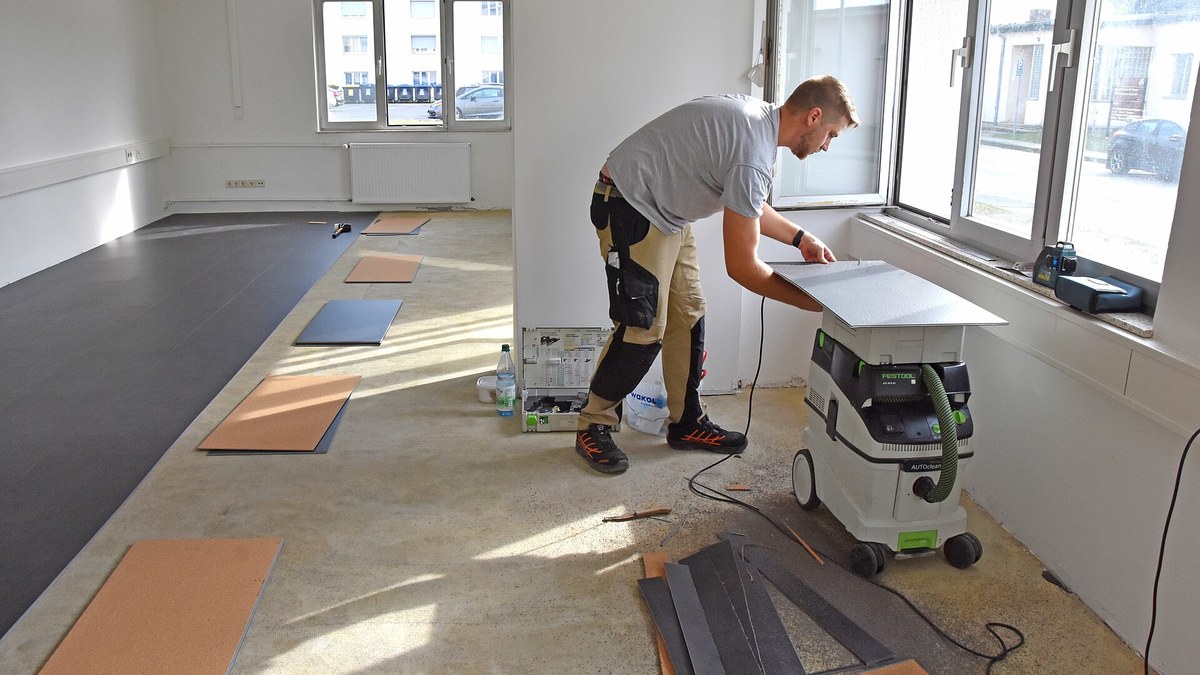
- Click-lock the planks (4–10 hours per 600 sq ft). Work left to right, tongue side toward the wall, with 1/4-inch expansion spacers at every wall. Tap joints snug with a tapping block, never a hammer directly on the plank edge.
- Cut around obstacles (1–3 hours). Use a jigsaw for door jambs, vents, and pipes. Undercut door jambs so planks slide underneath for a clean look.
- Install transitions and trim (1–3 hours). Add T-moldings at doorways, reducers where vinyl meets another floor height, and quarter-round or baseboard to cover the expansion gap.
- Final inspection (30 minutes). Walk every row, check for hollow spots, gapped seams, and rocking planks. Re-seat any loose joints before moving furniture back.
Materials and Tools List
Materials: vinyl planks (plus 10% waste), moisture barrier or underlayment if required, 1/4-inch spacers, T-moldings and reducers, quarter-round or baseboard, color-matched caulk for wet areas, leveling compound if the subfloor needs it.
Tools: tape measure, pencil, utility knife with extra blades or a vinyl plank cutter, tapping block, pull bar, jigsaw or miter saw, 10-foot straightedge or level, knee pads, safety glasses, dust mask for subfloor work.
9 Mistakes That Cost Vinyl Plank Owners Real Money
- Skipping acclimation. Planks installed cold or straight from the garage can expand or gap. Cost to fix: a full re-install of the affected rows.
- Ignoring subfloor flatness. Every bump telegraphs through vinyl. A $400 leveling job skipped today becomes a $2,000+ replacement next year (planning estimate).
- Buying the thinnest plank to save money. A 6-mil wear layer in a hallway with dogs will look tired in two years. Match the wear layer to the traffic, not the price tag.
- Forgetting the expansion gap. Vinyl moves with temperature. Planks jammed tight against walls buckle in summer heat. Leave the full 1/4 inch everywhere.
- Mixing dye lots. Two batches of the same color can differ visibly. Check lot numbers before the first row goes down.
- Floating over a failing floor. Loose tile, cushioned vinyl, or a spongy subfloor will ruin the new floor. Remove it or fix it first.
- Using the wrong cleaner. Steam mops and wax-based polishes can damage the wear layer and void warranties. Use the manufacturer’s recommended cleaner.
- Dragging heavy furniture. Appliances and pianos dent rigid cores and tear seams. Use felt pads and furniture sliders, always.
- Accepting a lump-sum quote. A single per-sq-ft number hides exclusions. Demand line items for prep, removal, transitions, and stairs.
Permits and Safety
Like-for-like flooring replacement almost never needs a building permit in the U.S., but rules vary by city and county — a quick call to your local building department settles it. Permits are more likely when the job touches structure, changes room use, or is part of a larger permitted remodel.
Lead paint: if your project disturbs painted trim, baseboards, or walls in a home built before 1978, EPA RRP lead-safe rules apply. Hire an RRP-certified firm for that portion or test first.
Asbestos: pre-1980 vinyl tile (especially 9-by-9 tiles), sheet flooring, and black mastic adhesive may contain asbestos. Do not sand, grind, or scrape suspect material — have it tested by a licensed lab first. If it tests positive, hire a licensed abatement contractor.
Other safety notes: keep vinyl plank away from direct high-heat sources, verify radiant-heat compatibility with the manufacturer before installing over heated floors, and wear a dust mask when grinding or leveling subfloors.
Financing a Vinyl Plank Flooring Project
Most vinyl plank projects are small enough to pay cash, and cash keeps the project cheapest because there is no interest. For whole-home projects or combined remodels, homeowners commonly consider a home equity line of credit (HELOC), a home equity loan, or a cash-out refinance, which typically carry lower interest costs than unsecured borrowing but use the home as collateral. A personal loan is another option — faster to arrange, usually unsecured, and typically with a shorter repayment term. This is general information, not financial advice: compare total borrowing costs, monthly payments, and repayment terms with your lender before choosing, and never borrow more than the project actually needs.
How to Hire a Contractor: 6 Questions, Red Flags, License Check
Ask every bidder:
- Is your quote itemized — materials, labor, prep, removal, transitions, and stairs on separate lines?
- What subfloor flatness standard do you guarantee, and how do you measure it?
- Which plank brand, core type, thickness, and wear layer are you quoting, and can I see the spec sheet?
- How do you handle moisture testing on concrete slabs, and what happens if readings are high?
- What does your workmanship warranty cover, and for how long?
- Can I see photos of two recent vinyl plank jobs and contact one past client?
Red flags: a single lump-sum number with no line items, a quote far below the other two, demands for full payment upfront, no proof of insurance, pressure to sign today, or a contractor who says subfloor prep is unnecessary without ever measuring flatness.
License check: look up the contractor on your state’s contractor license board website and confirm the license is active and in good standing. Also verify general liability insurance and, where required, workers’ compensation coverage before anyone starts work.
Ready to get numbers for your home? Get 3 quotes from local pros — compare itemized bids side by side before you commit.
LVP vs LVT Explained
Luxury vinyl plank (LVP) and luxury vinyl tile (LVT) are the same material in two different looks. LVP is cut into long, narrow planks designed to mimic hardwood flooring, with realistic wood-grain textures, bevelled edges, and color variation. LVT is cut into tile-like formats — squares and rectangles — designed to look like ceramic, stone, or concrete, often with printed “grout lines” built into the design.
Under the hood, both share the same layered construction: a wear layer (measured in mils, typically 6 to 30), a printed design layer, and a rigid or flexible vinyl core (WPC, SPC, or standard vinyl). Both are waterproof at the surface, scratch-resistant to varying degrees, and install with the same methods — click-lock floating, glue-down, or peel-and-stick.
Does LVP cost more than LVT?
In practice, no — the price difference is negligible. Both materials run $2 to $10 per square foot for typical residential products, with installation at $1.50 to $4.50 per square foot for standard jobs. Some retailers charge slightly more for LVP because the wood-look aesthetic is in higher demand, and certain premium LVT patterns with complex tile graphics can cost more than basic planks. But at equal quality levels — same wear layer, same core type, same brand tier — LVP and LVT cost essentially the same. Choose based on the look you want and the room you’re flooring, not the price tag.
Which rooms suit LVP vs LVT?
LVP’s warm, wood-look feel makes it the default choice for living rooms, bedrooms, hallways, and open-concept spaces — anywhere you’d traditionally lay hardwood. It reads slightly softer and warmer underfoot. LVT’s stone-look works naturally in bathrooms, kitchens, entries, and laundry rooms where a tile aesthetic fits the design. Both are waterproof and appropriate for wet areas, so the decision is really about design continuity: run LVP through the whole main level for a cohesive wood look, or use LVT in tile-heavy rooms for visual variety.
Common Add-On Costs That Change the Quote
A per-square-foot quote rarely tells the whole story. These extras are where budgets get surprised:
| Additional Service | Typical Cost (per sq ft) | When It’s Needed |
|---|---|---|
| Subfloor leveling / prep | $1.50 – $3.50 | Floors out of level more than 1/4″ over 10 feet |
| Existing floor removal | $1.00 – $3.00 | Tearing out old carpet, tile, or sheet vinyl |
| Furniture moving | $0.50 – $1.50 | When rooms can’t be cleared by the homeowner |
| Underlayment | $0.50 – $1.50 | Required for some floating floors; improves sound and feel |
| Baseboard removal / reinstall | $1.00 – $2.50 | When replacing flooring under existing trim |
| Stairs | $100 – $300 per stair | Stair nosing and riser work is specialized labor |
Complex room layouts — hallways, closets, doorways, kitchen islands, irregular walls — can increase labor 25–50% because of the extra cutting, fitting, and transition work.
Vinyl Plank Flooring FAQs
How much does it cost to install 1,000 sq ft of vinyl plank flooring?
Expect $3,500 to $17,000 for a 1,000 sq ft project, per NEDES Estimating’s 2026 synthesis of Today’s Homeowner and This Old House data. The wide range reflects plank tier, prep needs, and whether stairs or complex layouts are involved. A mid-range rigid-core install with light prep typically lands near $5,000–$8,000 for 1,000 sq ft (planning estimate).
Is luxury vinyl plank waterproof?
The plank itself is waterproof — spills and pet accidents will not damage the core. The weak points are the seams and the subfloor below them. Standing water can seep through joints over time, so wipe up spills promptly and seal perimeter gaps in bathrooms and kitchens with color-matched caulk.
What is the best wear layer thickness for vinyl plank?
For most homes, 12–20 mil is the sweet spot: 12 mil for bedrooms and low-traffic rooms, 20 mil for living areas, kitchens, and homes with pets. Go to 28 mil or higher only for rental units, commercial spaces, or very heavy traffic — you pay more for durability you may never need.
Can you install vinyl plank over tile or hardwood?
Yes, if the existing floor is flat, firmly bonded, and free of loose tiles or boards. Grout lines deeper than 1/8 inch should be skimmed level first, or they will telegraph through the vinyl. Always check the manufacturer’s installation instructions — some warranties require a specific underlayment or forbid floating over certain floors.
How long does vinyl plank flooring last?
Quality rigid-core vinyl plank typically lasts 15–25 years in a home, depending on wear layer thickness and traffic (planning estimate). Budget flexible plank in a busy hallway may show wear in 5–10 years. Manufacturer warranties often run 10–30 years for residential use — read the fine print, since most cover manufacturing defects, not normal wear.
Is vinyl plank cheaper than laminate?
They overlap. Budget vinyl plank can cost less than mid-range laminate, but mid-range rigid-core LVP often costs about the same as quality laminate installed. Vinyl wins on water resistance, which makes it the safer pick for kitchens, bathrooms, and basements. Compare both in our flooring cost per square foot guide.
The Bottom Line
Vinyl plank flooring is the best value in flooring for most homeowners in 2026: $3 to $10 per square foot installed buys a waterproof, durable, realistic wood look at a fraction of hardwood’s price. Spend your money on a 20-mil wear layer and proper subfloor prep rather than the fanciest pattern, get three itemized bids, and leave the expansion gap the manufacturer specifies. Do that, and a mid-range floor will look great for decades.
Get 3 quotes from local pros and compare them line by line before you buy a single box.
How we estimated these costs: figures in this guide link to published 2026 pricing sources named inline. Where no published source covers a figure, it is labeled a planning estimate based on typical project ranges. Get itemized local bids for your exact number.