Transparency: Renovation Guide HQ carries no affiliate links. Every cost figure below is either linked to its published source or clearly labeled as a planning estimate. If you need contractor quotes, contact us and we will point you in the right direction.
By Renovation Guide HQ · Updated October 8, 2026
Quick Answer: What Size Bathroom Exhaust Fan Do You Need?
Size the fan at 1 CFM per square foot of bathroom floor, with a 50 CFM minimum — an 80 sq ft bath needs an 80 CFM fan, per HVI sizing guidelines. Vent it directly outdoors — never into an attic or crawl space. A pro-installed replacement runs $250–$950, per 2026 HomeGuide data. Pick 1.5 sones or less for quiet operation, and put the fan on a timer or humidity-sensor switch so it runs about 20 minutes after you leave.
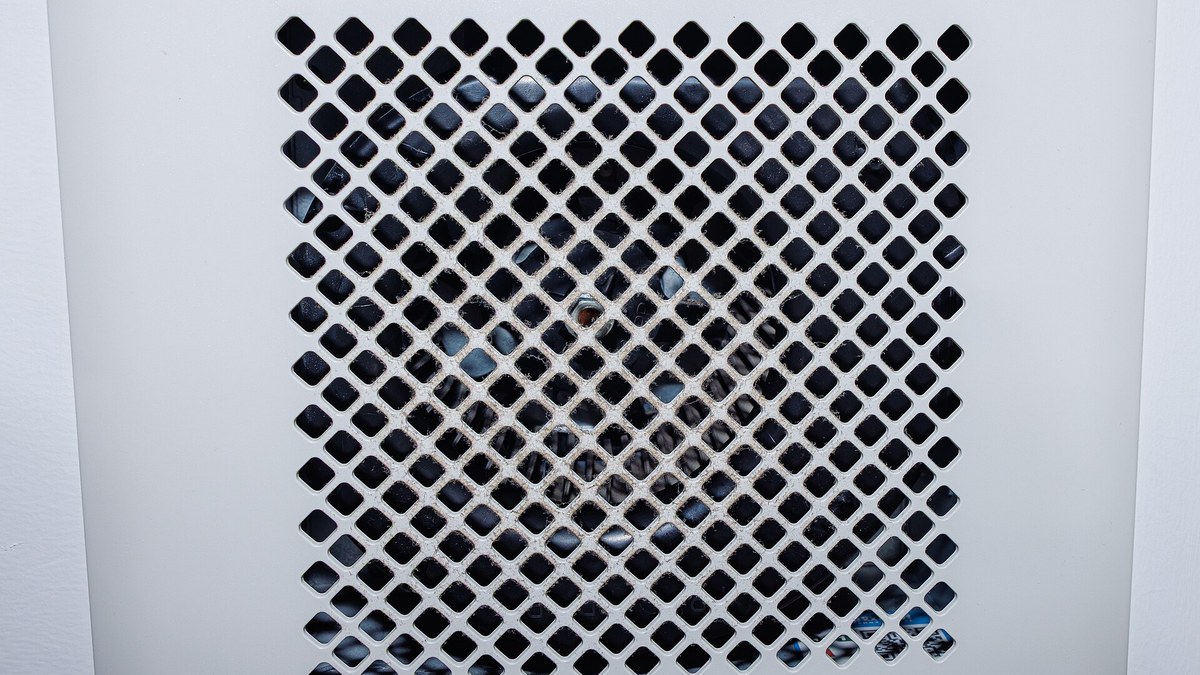
The exhaust fan is the least glamorous fixture in a bathroom and one of the most important. Its real job is moisture control, not odor control: after a hot shower, humidity settles onto walls, ceilings, and fixtures, and over time that moisture causes mold, mildew, damaged drywall, peeling paint, and warped trim, per Angi’s ventilation guidance.
Bathroom Exhaust Fan Sizing: The CFM Rules
CFM (cubic feet per minute) is how much air the fan moves. The Home Ventilating Institute (HVI) rules are simple and worth following exactly, per 2026 sizing references:
Rule 1: Bathrooms under 100 sq ft — 1 CFM per square foot
Multiply length by width. An 8×10 ft bathroom is 80 sq ft, so it needs an 80 CFM fan. Round up to the next model size, never down, per sizing guidance. And never go below 50 CFM — even a 30 sq ft half-bath gets a 50 CFM fan, because that is the practical minimum manufacturers build.
| Bathroom size | Minimum CFM | Typical fan to buy |
|---|---|---|
| Under 50 sq ft (powder room) | 50 CFM | 50 CFM |
| 50–75 sq ft | 50–75 CFM | 70–80 CFM |
| 75–100 sq ft | 75–100 CFM | 80–110 CFM |
| 5×8 ft hall bath (40 sq ft) | 50 CFM (minimum applies) | 50 CFM |
Rule 2: Bathrooms over 100 sq ft — count fixtures, not floor area
Past 100 sq ft, floor area stops scaling accurately. The HVI sizes large baths by fixture instead: 50 CFM per toilet, 50 CFM per shower, 50 CFM per standard bathtub, and 100 CFM per jetted tub. A primary bath with a toilet, a walk-in shower, and a soaking tub needs 150 CFM; add a separate water closet and you are at 200 CFM, per HVI fixture guidance. For steam showers or soaking tubs, bump another 20–30% above baseline.
One design note from installer guidance: in a bath with a separate water closet or an enclosed shower, consider two smaller fans instead of one large one. Steam does not travel well around corners or through doorways, so a single powerful unit in the main room leaves the enclosed spaces damp.
Rule 3: High ceilings — size by volume
Standard sizing assumes 8-foot ceilings. For taller rooms, multiply square footage by ceiling height to get cubic feet, divide by 60, and multiply by 8 air changes per hour. A 100 sq ft bath with 12-foot ceilings: 1,200 cubic feet ÷ 60 × 8 = 160 CFM, per HVI volume method. A simpler alternate formula from sizing guides: square footage × ceiling height ÷ 7.5 — a 60 sq ft room with a 10-foot ceiling needs 80 CFM, not 60.
Sones: How Loud Is the Fan?
CFM tells you how much air moves; sones tell you how loud it sounds. The sone scale measures perceived loudness — double the sones, double the loudness, per a home inspector’s sone guide:
| Sone rating | What it sounds like | Verdict |
|---|---|---|
| 1.0 or less | Barely audible; about as loud as a quiet refrigerator | Quiet — ideal for primary and guest baths |
| 1.5 | Soft background hum | Quiet enough for most people (Home Depot’s quiet threshold) |
| 2–3 | Clearly audible | Average to mediocre |
| 4.0+ | Heard a room or two away with the door closed | Loud — the classic builder-grade drone |
Noise matters more than it seems: a loud fan is a fan that never gets turned on, which defeats the entire purpose, per installation mistake guides. Home Depot’s buying guide sets the quiet bar at about 1.5 sones or less.
The toilet-paper test: hold a square of toilet paper to the grille while the fan runs. If it sticks, the fan is pulling properly. If it falls, the fan is underpowered, clogged, or improperly vented, per inspector guidance.
Fan Types and Features Worth Paying For
- Fan only: the basic box — $15–$80 for the unit, per Angi pricing. Fine for a straightforward replacement.
- Fan with light: $35–$420. A fan/light combo can replace an existing light fixture using the wiring and switch already there, per Home Depot — the easiest upgrade path when you want both.
- Fan with heater: $75–$425. Nice in cold climates, but heaters draw far more power — confirm your circuit can handle the load.
- Humidity-sensor models: turn on automatically when steam rises and shut off when humidity drops. The best defense against the “fan off too soon” problem.
- Timer switches: run the fan about 20 minutes after you leave — vital for full moisture extraction, per mold-prevention guidance. Cheap, and the single highest-value add-on.
- ENERGY STAR models: use about 60% less energy than standard fans and tend to be quieter too, per Home Depot. DC-motor fans are the quietest and most efficient of the bunch.
- Retrofit / room-side install models: designed to install entirely from below, with no attic access needed — useful in condos and finished spaces, per installer notes. You still must verify where the ducting goes.
Venting: The Part Most Installations Get Wrong
You can buy the perfect fan and still fail if the ductwork is wrong. Installation quality is the hidden factor, per contractor guidance.
The non-negotiable rule: vent directly outdoors
The International Residential Code is explicit: bathroom exhaust air shall be exhausted directly to the outdoors and shall not discharge into an attic, crawl space, or other areas inside the building (IRC M1505.2), per code references. Venting into an attic does not make the moisture disappear — it collects where you cannot see it, creating mold and rot, per venting guides. If your current fan dumps into the attic, fixing that is the single most valuable ventilation upgrade you can make. Note: a separately enclosed toilet room needs its own exhaust fan in addition to the shower/bath area fan.
Roof vs. wall vs. soffit termination
- Roof vent: the most common choice for top-floor and single-story baths. Best when the bathroom has real moisture problems. Keep the penetration as high on the roof as practical — less water flows past it, so it wears slower and leaks less.
- Wall (gable-end) vent: the right choice for first-floor baths in multi-story homes, vented through the side of the house, per Home Depot.
- Soffit vent: acceptable in some jurisdictions when done properly — rigid duct, approved cap with a working damper — but risky where the soffit also serves as attic intake, since humid air can be drawn right back into the attic. Some installers block nearby soffit intake vents to prevent this.
Code clearances for the termination (IRC M1504.3): at least 3 feet from property lines, 3 feet from operable windows, doors, and gravity intakes, and 10 feet from mechanical air intakes (unless the opening is at least 3 feet above the intake), per code references.
Duct material and routing
- Use smooth-wall rigid metal duct, minimum 4-inch diameter. Cheap 3-inch flexible plastic duct does not cut it and is not allowed under current standards, per Inspectapedia’s venting reference. A 4-inch duct suits fans up to about 50 CFM; larger fans need larger ducts — match the duct to the fan’s outlet diameter.
- Rigid beats flexible. Corrugated flex creates friction that cuts airflow and adds noise. Insulated flexible duct is permissible, but smooth rigid metal moves more air with less resistance, per ducting guides.
- Insulate any duct run through an unconditioned attic (R-6 or higher). Warm moist exhaust air cooling inside a cold duct creates condensation that drains back toward the fan and into the ceiling.
- Keep runs short and straight — every bend adds static pressure and cuts airflow. Allow 2–3 feet of straight duct before the first elbow, and avoid low points where water can collect.
- Seal every connection with UL-approved foil tape or mastic — never standard cloth duct tape, which dries out and fails. Install a backdraft damper at the exterior termination (many fans and caps include one) to keep cold air, pests, and backdrafts out.
Wiring and Electrical Safety
Safety first: turn off the breaker serving the bathroom circuit before touching any wiring, and verify the power is actually off with a non-contact voltage tester. If you are not comfortable working with electrical wiring, hire an electrician — a fan install is a small job and a cheap service call beats a hospital visit.
- Standard fan wiring is simple: black (hot) to black, white (neutral) to white, green or bare copper (ground) to ground, joined with wire nuts and tucked into the fan’s junction box. If your house wires do not match these colors, stop and determine what each wire is before connecting — when in doubt, call an electrician.
- Fan over a tub or shower: the fan must be rated for a damp or wet location and be GFCI-protected. Check your local inspector’s preference — some want a GFCI breaker in the panel rather than protection downstream of a GFCI receptacle, per trade discussion.
- New circuit = electrician. A like-for-like swap on existing wiring is the most DIY-friendly scenario. Running a brand-new circuit from the panel, adding a heater-fan with heavy draw, or any work your state reserves for licensed electricians belongs to a pro.
- Check local code and permits. Electrical work and new roof penetrations often need a permit and inspection. A fan/electrical permit is typically a small fee (planning estimate: $50–$150) — skipping it risks fines and insurance problems.
Installation Overview: Replacement vs. New Install
Scenario A: Replacing an existing fan (DIY-friendly, 1–2 hours)
- Turn off the breaker and verify power is off.
- Remove the grille and disconnect the old fan (unplug the motor assembly, disconnect the duct, release the housing).
- If the new housing is larger than the old opening, enlarge the drywall cutout to the template — measure twice.
- Secure the new housing to the joist, reconnect the duct (seal with foil tape), and wire black-to-black, white-to-white, ground-to-ground with wire nuts.
- Restore power, test the fan and any light, then attach the grille and patch/paint the ceiling edge.
DIY difficulty: 2 out of 5 for a same-size swap with attic access. No-attic-access retrofit models install entirely from below.
Scenario B: New install where no fan exists (hire a pro, typically 3–4 hours)
- Plan the location: over or near the shower for moisture capture, at least 7 feet above the floor, clear of joists and plumbing.
- Run the electrical: new cable from the switch location to the fan, on an appropriate circuit — electrician territory.
- Cut the ceiling opening, mount the housing to joists.
- Route rigid duct through the attic to the roof or wall, insulate it, and terminate with a dampered cap flashed and sealed against weather.
- Wire, test, and finish the ceiling.
Who to call: an electrician for the wiring, or a general contractor / handyman who can coordinate the electrical, ductwork, roof penetration, and drywall patching in one visit, per Angi’s hiring guide.
What Bathroom Exhaust Fan Installation Costs in 2026
| Scenario | Typical cost | Source / basis |
|---|---|---|
| Fan unit only (basic) | $15–$80 | Angi |
| Fan unit only (with light) | $35–$420 | Angi |
| Fan unit only (with heater) | $75–$425 | Angi |
| Pro replacement (existing wiring + duct) | $250–$950 | HomeGuide (materials + labor) |
| Typical installation job (3–4 hours) | $100–$900 | Angi |
| New install (new duct + roof/wall vent + electrical) | $600–$1,200 | Planning estimate (unit + electrician $50–$130/hr × 3–4 hrs + duct/cap materials) |
| DIY swap (existing wiring + duct) | Under $100 | Planning estimate (fan $15–$80 + basic supplies) |
Regional 2026 data from Manta shows the spread: Fort Worth TX $142–$762, Lawrenceville GA $135–$724, Palatine IL $169–$905. Labor is the swing factor — electricians run $50–$130/hr, per HomeGuide. During a full remodel, adding or upgrading the fan is cheapest — the ceiling is open and the electrician is already there. See our bathroom remodel steps guide for where ventilation fits in the project sequence.
7 Exhaust Fan Mistakes to Avoid
- Venting into the attic or crawl space. The #1 violation and the #1 cause of hidden mold. Code requires discharge directly outdoors — no exceptions for small bathrooms.
- Buying an undersized fan. A 50 CFM fan in a 120 sq ft master bath will run forever and still leave the mirrors fogged. Size by the HVI rules above.
- Ignoring sones. A 4-sone bargain fan that nobody turns on is worse than no fan at all — at least a broken fan is honest about it. Stay at 1.5 sones or less.
- Uninsulated duct through a cold attic. Warm exhaust air condenses inside cold duct, drips back, and stains the ceiling — or worse. Insulate to R-6+.
- Sealing ducts with cloth duct tape. It dries, cracks, and fails. Foil tape or mastic only.
- No timer or humidity control. Moisture lingers 15–20 minutes after a shower. If the fan stops when you flip the switch, the job is half done.
- Skipping the permit for new electrical or roof work. A small permit fee beats a failed inspection, a roof leak with no paper trail, or an insurance dispute.
Planning a bathroom project? Tell us about it and we will point you toward the right questions to ask local pros — contact Renovation Guide HQ.
Bathroom Exhaust Fan Installation FAQ
What size exhaust fan do I need for my bathroom?
For bathrooms under 100 sq ft: 1 CFM per square foot of floor area, with a 50 CFM minimum. For bathrooms over 100 sq ft: count fixtures — 50 CFM per toilet, shower, and standard tub, 100 CFM per jetted tub.
Can a bathroom exhaust fan vent into the attic?
No. The International Residential Code (M1505.2) requires bathroom exhaust to discharge directly outdoors — never into an attic, soffit, crawl space, or anywhere else inside the building. Venting into an attic traps moisture that causes mold, insulation damage, and wood rot, per code guidance. If yours currently vents into the attic, rerouting it outside is the most valuable ventilation fix you can make.
How long should I run the bathroom fan after a shower?
About 20 minutes after you leave the bathroom. Moisture keeps evaporating off wet surfaces well after the shower stops, and cutting the fan early leaves that humidity in the room. A timer switch or humidity-sensor switch handles this automatically, per mold-prevention guidance — it is the cheapest meaningful upgrade to any fan.
What is a good sone rating for a bathroom fan?
1.5 sones or less is quiet; 1.0 or less is nearly silent. Sones measure perceived loudness — doubling the sones doubles the perceived noise. At 2–3 sones a fan is clearly audible, and at 4+ sones (typical builder-grade) it can be heard rooms away. A quiet fan gets used; a loud one gets left off, per sone rating guides.
Can I install a bathroom exhaust fan myself?
A like-for-like replacement on existing wiring and ductwork is one of the more DIY-friendly electrical projects — difficulty about 2 out of 5 with attic access, and retrofit models install from below with no attic access. But turn off the breaker and verify power is off first, and hire a licensed electrician for new circuits, heater-fans with heavy draw, or any wiring your state reserves for pros. New ducting through the roof is also pro territory for most homeowners.
Do I need a permit to install a bathroom exhaust fan?
Often yes for new electrical work or a new roof/wall penetration — requirements vary by jurisdiction, so check with your local building department before starting. A simple like-for-like swap on existing wiring typically does not need one. The permit fee for fan/electrical work is usually small (planning estimate: $50–$150); skipping a required permit risks fines and inspection failures at resale.
The Bottom Line
Buy the right size (1 CFM per sq ft, 50 CFM minimum), buy it quiet (1.5 sones or less), vent it directly outdoors through insulated rigid duct with a dampered cap, and put it on a timer or humidity-sensor switch. A pro replacement runs $250–$950; a full new install with fresh ducting lands around $600–$1,200 as a planning estimate. The fan is a small line item that protects everything else in the room — drywall, paint, trim, and the framing behind them. For the full project picture, see our 2026 bathroom remodel cost guide, small bathroom remodel guide, walk-in shower guide, and tub-to-shower conversion guide.
How We Estimated These Costs
Cost figures in this guide come from published 2026 sources: Angi’s fan pricing and hiring guide (unit prices $15–$80 / $35–$420 / $75–$425), HomeGuide’s installed fixture costs ($250–$950 exhaust fan; electrician $50–$130/hr), Angi’s Ask Angi installation data ($100–$900 typical, 3–4 hours), and Manta’s 2026 county cost data. Sizing follows HVI guidelines via sizing references; venting code follows IRC M1504.3/M1505.2 via code references and venting guides. Ranges explicitly marked “(planning estimate)” are our synthesis of multiple published ranges, not quotes from any single source. Figures are national; your market will differ. Last updated October 2026.