
Disclosure: This guide contains no affiliate links. We earn nothing if you buy a floor mentioned here.
By Renovation Guide HQ · Updated October 17, 2026
Updated: October 2026
Quick Answer
For most kitchens, rigid-core luxury vinyl plank is the best overall pick at $4 to $10 per sq ft installed, waterproof and comfortable underfoot. Porcelain tile is the toughest at $10 to $20 per sq ft installed. A 200 sq ft kitchen floor costs $1,500 to $4,000 and takes 1 to 3 days to install.
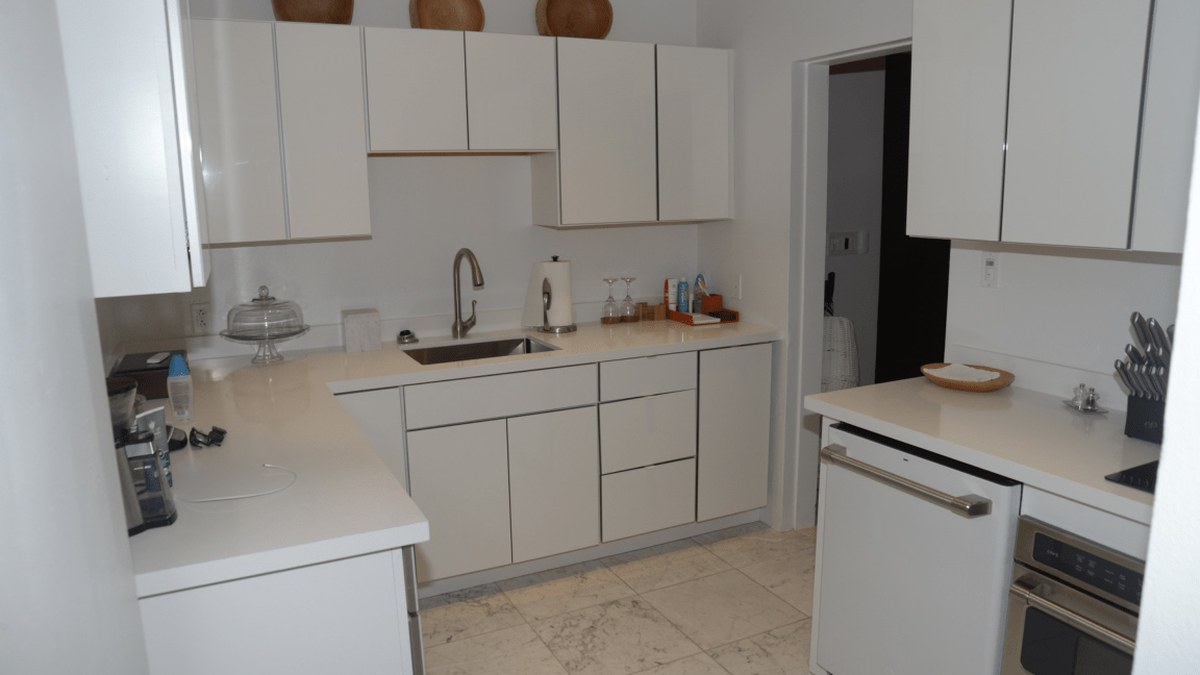
Your kitchen floor takes more punishment than any other floor in the house: boiling water, dropped cast-iron pans, greasy splatter, pet claws, and the slow drip from a dishwasher you do not notice for a week. The right floor survives all of it and still looks good in ten years. The wrong floor swells, stains, or cracks, and you pay for the job twice. This guide ranks the six realistic kitchen flooring options on installed cost, water resistance, durability, comfort, and lifespan, then shows you exactly what a real 200 sq ft kitchen costs. For the full per-material price table across every flooring type, see our flooring cost per square foot guide.
Best Kitchen Flooring at a Glance
| Flooring | Installed cost per sq ft | Water resistance | Lifespan | Best for | Timeline |
|---|---|---|---|---|---|
| SPC luxury vinyl plank | $4 to $10 | Waterproof core | 15 to 25 years | Most kitchens, pets, kids | Install: 1 to 2 days |
| Porcelain tile | $10 to $20 | Waterproof with sealed grout | 50 to 100 years | Maximum durability, radiant heat | Install: 2 to 4 days |
| Engineered hardwood | $5 to $16 | Water-resistant, not waterproof | 20 to 40 years | Open-plan kitchens, resale value | Install: 2 to 3 days |
| Water-resistant laminate | $3 to $13 | Water-resistant, seams vulnerable | 15 to 25 years | Budget refresh, low leak risk | Install: 1 to 2 days |
| Natural stone | $6 to $20 | Waterproof when sealed | 50 to 100 years | High-end kitchens | Install: 3 to 5 days |
| Solid hardwood | $6 to $25 | Poor. Spills must be wiped fast. | 50 to 100 years with refinishing | Period homes, whole-home wood flow | Install: 3 to 5 days |
Porcelain tile installed cost comes from USA Today. Engineered hardwood, solid hardwood, laminate, and natural stone ranges come from Angi. SPC vinyl plank and the lifespan figures are planning estimates based on the comparison ranges in our vinyl plank flooring cost guide and hardwood floor installation cost guide.
Cost Table: What Each Kitchen Floor Really Costs Installed
| Flooring | Low (per sq ft installed) | Average (per sq ft installed) | High (per sq ft installed) | Labor share | Materials share | Timeline |
|---|---|---|---|---|---|---|
| SPC luxury vinyl plank | $4 | $6 | $10 | About 30 to 40 percent | About 60 to 70 percent | Quote to install: 1 to 3 weeks |
| Porcelain tile | $10 | $15 | $20 | About 55 to 65 percent | About 35 to 45 percent | Quote to install: 2 to 5 weeks |
| Engineered hardwood | $5 | $9 | $16 | About 35 to 45 percent | About 55 to 65 percent | Quote to install: 2 to 4 weeks |
| Water-resistant laminate | $3 | $6 | $13 | About 30 to 40 percent | About 60 to 70 percent | Quote to install: 1 to 3 weeks |
| Natural stone | $6 | $12 | $20 | About 50 to 60 percent | About 40 to 50 percent | Quote to install: 3 to 6 weeks |
| Solid hardwood | $6 | $12 | $25 | About 40 to 50 percent | About 50 to 60 percent | Quote to install: 2 to 5 weeks |
Labor and materials shares are planning estimates. Tile and stone labor runs highest because setting, leveling, and grouting are slow skilled work. Floating vinyl plank and laminate install fastest, so labor is a smaller share. Quotes far below these ranges usually leave out subfloor prep, old floor removal, or trims.
Worked Budget Example: A Real 200 Sq Ft Kitchen, SPC Vinyl Plank
A 200 sq ft kitchen, mid-range SPC vinyl plank with a 20 mil wear layer, professional install, old sheet vinyl removed. Every line item is included so the total is honest.
| Line item | Cost |
|---|---|
| SPC vinyl plank materials, 220 sq ft with 10 percent waste at $4 per sq ft | $880 |
| Installation labor, 200 sq ft at $2.50 per sq ft | $500 |
| Subfloor prep and leveling | $250 |
| Underlayment, if not attached to the plank | $100 |
| Trims, transitions, and thresholds | $120 |
| Old floor removal and disposal | $350 |
| Total | $2,200 |
That is $11 per sq ft all-in for the finished room. The same kitchen in porcelain tile runs about $3,000 to $4,500 all-in, planning estimate, because tile labor is roughly double and grout, thinset, and backer board add material cost. The same kitchen in engineered hardwood runs about $2,500 to $3,800 all-in, planning estimate. Ask every bidder to quote the same six line items so bids compare fairly. See our vinyl plank flooring cost guide for a deeper breakdown of that material.
What $1,500, $3,000, and $6,000 Actually Buys
- $1,500 buys a DIY vinyl plank or laminate floor in a small kitchen up to about 150 sq ft, or a professional install of budget vinyl in a very small kitchen. It does not buy tile or hardwood installed.
- $3,000 buys a professionally installed SPC vinyl plank or laminate floor in a standard 200 sq ft kitchen, including removal and prep. This is the sweet spot for most families.
- $6,000 buys a professionally installed porcelain tile floor in a 200 sq ft kitchen, or engineered hardwood through the kitchen and an adjoining dining area. At this budget, pay for full subfloor prep and a quality grout or finish.
Budget anchors are planning estimates based on the worked example above.
The Six Kitchen Flooring Options, Ranked
1. SPC Luxury Vinyl Plank: Best Overall for Most Kitchens
SPC stands for stone plastic composite. The rigid core is waterproof all the way through, so a spilled pot or a slow dishwasher leak will not swell or delaminate it. It is softer and warmer underfoot than tile, which matters when you stand cooking for an hour. The best products are hard to tell from real wood. Buy a wear layer of at least 20 mil for a kitchen, and 20 mil or thicker if you have dogs. Floating click-lock planks install fast, often in one to two days, and can float over many existing floors.
Watch out for: very heavy point loads can dent it, some products fade in strong direct sun, and cheap thin planks feel hollow. It cannot be refinished, so when the wear layer goes, the floor gets replaced.
2. Porcelain Tile: Toughest and Best With Radiant Heat
Porcelain is clay fired at very high temperatures, with water absorption below 0.5 percent. It is harder and denser than ceramic, resists stains without sealing, and barely expands or contracts with temperature. It is the ideal partner for electric radiant heat, which takes the chill off cold mornings. Pick a matte or textured finish for a kitchen. Polished tile looks sleek but gets slippery when wet.
Watch out for: tile is hard and cold underfoot, a dropped glass will not survive, and grout is the weak link. Grout needs sealing and periodic cleaning. Large-format tile needs a very flat, stiff subfloor, so budget for floor prep instead of discovering the problem mid-job. Installation is the slowest of the common options.
3. Engineered Hardwood: Best Look and Resale Value
Engineered hardwood is a real wood veneer over plywood layers. It handles kitchen humidity far better than solid wood and connects the kitchen seamlessly to wood floors in the rest of the home. Buyers pay a premium for real wood. A thicker veneer, about 3 to 4 mm, can be refinished once or twice.
Watch out for: it is water-resistant, not waterproof. Standing water from a leak will damage it. Wipe spills promptly, keep a mat at the sink and dishwasher, and never install it where water pools. See our hardwood floor installation cost guide for the full price picture.
4. Water-Resistant Laminate: Best Budget Refresh
Laminate is a printed photo layer under a hard aluminum oxide coating over a fiberboard core. It is the cheapest wood-look floor and the most scratch-resistant per dollar. Newer water-resistant laminates handle splashes far better than old laminate, and click-lock install makes it a strong DIY pick.
Watch out for: it is water-resistant, not waterproof. Standing water swells the seams. Read the warranty carefully, because many exclude standing water damage. It cannot be refinished. Buy AC4 or higher for a kitchen.
5. Natural Stone: Most Beautiful, Most Maintenance
Slate, travertine, and granite floors are one of a kind, extremely durable, and add a high-end feel nothing synthetic matches. Sealed stone is waterproof and can last a century.
Watch out for: stone is heavy, needs a strong subfloor, and costs the most to install. It must be sealed and resealed, and some stones stain from oil or wine. It is cold and hard underfoot, like tile.
6. Solid Hardwood: Beautiful, but Risky in a Kitchen
Solid hardwood is one piece of wood, usually 3/4 inch thick, that can be refinished many times over 50 to 100 years. It is the best choice when the kitchen flows into hardwood living areas and you want one continuous floor.
Watch out for: water is its enemy. One unnoticed dishwasher leak can cup boards and force a partial replacement. It also dents under dropped pans and needs refinishing every 15 to 25 years in a busy kitchen. Only choose it if your household is disciplined about spills.
Regional Differences
Flooring labor is local. Material prices are fairly similar across the US because big retailers and online sellers ship nationwide, but installer rates follow local wages. The figures below are illustrative planning estimates, not quotes from a published source.
| Region | Labor vs. national average | What it means for a 200 sq ft kitchen |
|---|---|---|
| Northeast | About 10 to 20 percent higher | Add $150 to $400 to the labor line |
| West, coastal metros | About 10 to 20 percent higher | Add $150 to $400 to the labor line |
| South | At or below average | Labor near the low end of each range |
| Midwest | At or below average | Labor near the low end of each range |
Urban quotes run higher than rural quotes in every region. Humidity matters too: in humid Gulf Coast and Southeast kitchens, waterproof cores and good ventilation matter more than in dry climates. Get three local bids before trusting any national range.
7 Cost Factors With Real Dollar Impact
- Subfloor condition, $200 to $1,500. Flat, dry subfloors need little prep. Uneven, squeaky, or water-damaged subfloors need leveling compound, patching, or new plywood. Tile and large-format planks demand the flattest subfloor. Vinyl plank shows every bump, so flatness matters most there.
- Old floor removal, $300 to $800 per kitchen. Sheet vinyl and carpet come up fast. Glued-down tile, two layers of old vinyl, or hardwood nailed to the subfloor take much longer. Some installers charge per layer.
- Appliance moves, $150 to $500, planning estimate. The fridge, range, and dishwasher must come out and go back. If the dishwasher supply line or drain needs work while it is out, that is a separate plumbing charge. Budget a dishwasher leak pan, about $20 to $40, while access is open.
- Pattern and waste, 5 to 15 percent of materials. Straight runs waste about 5 to 10 percent. Diagonal layouts and herringbone patterns waste 12 to 15 percent and add labor hours. Large-format tile needs more cuts around cabinets and islands.
- Radiant heat, $1,000 to $3,000 extra, planning estimate. Electric radiant mats under tile add real comfort and real cost: mats, thermostat, and an electrician. Porcelain and stone transfer heat best. Check that any vinyl product is rated for radiant heat before buying.
- Grout and sealing for tile, $150 to $500, planning estimate. Stain-resistant grout costs more upfront and saves cleaning time for years. Sealing grout and stone is an ongoing cost every 1 to 3 years. Epoxy grout costs more and resists stains far better.
- Transitions and toe-kicks, $100 to $400, planning estimate. Reducers where the kitchen meets another floor, thresholds, and toe-kick finishing add up. A new floor that is thicker than the old one can make appliance gaps and door clearances tight. Measure before you buy.
DIY vs. Hiring a Pro
| Factor | SPC Vinyl Plank | Porcelain Tile | Engineered Hardwood |
|---|---|---|---|
| DIY skill level, 1 to 5 | 2, beginner friendly | 4 to 5, advanced | 3 to 4, intermediate to advanced |
| Tools needed | Utility knife, straightedge, tapping block, pull bar, spacers, tape measure | Wet saw, tile cutter, notched trowels, tile spacers, grout float, mixing drill, level | Miter saw, table saw, moisture meter, tapping block, pull bar, nailer or stapler for glue-down and nail-down installs |
| Time for 200 sq ft | Pro: 1 to 2 days. DIY: 2 to 3 days | Pro: 2 to 4 days plus grout cure time. DIY: 4 to 7 days | Pro: 2 to 3 days. DIY: 3 to 5 days |
| DIY savings | $500 to $1,000 in labor, planning estimate | $1,500 to $3,000 in labor, planning estimate, but mistakes are expensive | $800 to $1,500 in labor, planning estimate |
| When to hire a pro | Uneven subfloors, glue-down installs, or rooms with many angles | Almost always. Leveling, thinset work, and grouting are easy to get wrong. | Glue-down installs, stairs, or when moisture testing is uncertain |
DIY vinyl plank and laminate are genuinely doable for a careful first-timer. DIY tile is not a good first project. A bad tile install cannot be undone without buying the floor twice. Legal and permit limits: flooring itself rarely needs a permit, but the work around it can. Moving a gas range or a gas line needs a licensed plumber or gas fitter. Any new electrical circuit for radiant heat needs a licensed electrician and a permit. Structural subfloor repair needs a permit and a licensed pro. Never cut or sand old flooring that might contain asbestos without testing first, and follow EPA RRP lead-safe rules in pre-1978 homes.
Step-by-Step: Installing a Floating Vinyl Plank Kitchen Floor
This sequence covers click-lock SPC vinyl plank, the best DIY option for kitchens. Tile and hardwood follow different processes and are best left to pros.
- Acclimate the planks, 48 to 72 hours. Stack unopened boxes flat in the kitchen. This lets the floor adjust to your home’s temperature and humidity.
- Test moisture and inspect the subfloor, 1 to 2 hours. Check concrete and wood subfloor moisture with a meter. Fix squeaks and level any dip deeper than about 3/16 inch over 10 feet.
- Remove appliances and old flooring, 2 to 6 hours. Shut off water to the fridge and dishwasher. Disconnect and move the fridge, range, and dishwasher. Pull the old floor and baseboards. Keep the dishwasher supply line accessible.
- Install underlayment and moisture barrier, 1 to 2 hours. Roll out underlayment per the product instructions. Overlap seams and tape them. Skip this step only if the product has attached underlayment and the maker says so.
- Plan the layout, 30 to 60 minutes. Measure the room. Stagger end joints by at least 8 inches. Avoid sliver cuts under 2 inches wide at the far wall by shifting the first row. Plan rows to run parallel to the longest wall or the main light source.
- Install the field, 4 to 8 hours. Click planks together row by row, working left to right. Leave a 1/4 inch expansion gap at every wall, cabinet toe-kick, and fixed object. Do not run floating flooring under heavy cabinets. Install it up to the cabinet toe-kicks, not underneath them, so the floor can expand and contract.
- Cut around the island, pipes, and vents, 1 to 3 hours. Undercut door jambs so planks slide underneath. Fit around water lines and vents with a jigsaw or hole saw.
- Install trims and transitions, 1 to 2 hours. Add T-moldings at doorways, reducers where the kitchen meets a lower floor, and shoe molding at toe-kicks.
- Reconnect appliances and test for leaks, 1 to 2 hours. Reconnect the dishwasher and fridge water lines. Run the dishwasher through a short cycle and check every connection for drips before pushing appliances back. A leak pan under the dishwasher costs little and saves a floor.
- Reinstall baseboards and clean up, 1 to 2 hours. Nail baseboards to the wall, never to the floor. A floating floor must stay free to expand and contract.
Materials and Tools List
- Flooring planks plus 5 to 10 percent extra for waste, and one full spare box for future repairs
- Underlayment and moisture barrier, unless the product includes attached padding
- 1/4 inch spacers
- Tapping block and pull bar
- Utility knife and straightedge for vinyl plank; wet saw for tile
- Tape measure, pencil, speed square
- Moisture meter
- Trims: T-moldings, reducers, thresholds, shoe molding
- Dishwasher leak pan
- Felt furniture pads
- Door jamb saw or oscillating tool
- Appliance dolly or sliders for moving the fridge and range
- Vacuum and damp mop for final cleanup
Keep one full box of spare planks after the job. Dye lots change, and a matching box is the difference between a 30-minute repair and a mismatched patch.
9 Mistakes That Cost Homeowners Thousands
- Running floating flooring under cabinets. Floating floors must expand and contract. Heavy cabinets pin the floor down, and it buckles. Install up to the toe-kicks, never underneath.
- Skipping acclimation. Planks installed straight from a cold garage expand later and buckle. Give them 48 to 72 hours in the room.
- Ignoring subfloor flatness. Floating floors bridge small dips, then flex and crack at the joints. Level first. It is cheaper than replacing the floor.
- Skipping the moisture test. A damp slab ruins laminate and warps hardwood. Test every concrete slab, even in dry climates.
- No expansion gap. Floors expand in summer humidity. Without a 1/4 inch gap, planks push against walls and buckle in the middle of the room.
- Buying the thinnest wear layer to save money. A 6 mil wear layer in a kitchen with two dogs is a replacement in five years. Buy 20 mil or thicker for kitchens.
- Forgetting the dishwasher leak. The number one kitchen floor killer is a slow dishwasher leak, not a spilled pot. Reconnect carefully, test with a full cycle, and add a leak pan.
- Sealing grout late or never. Ungrouted or unsealed grout absorbs grease and wine and never looks clean again. Seal grout as soon as it cures, and reseal on schedule.
- Mixing dye lots. Boxes from different production runs can differ in shade. Check lot numbers before you start and mix boxes as you go.
Permits and Safety
- Permits: Replacing a floor surface rarely needs a permit. Structural subfloor repair, joist work, moving walls, new electrical circuits, and gas line work do. Check with your local building department before starting anything beyond the floor surface.
- Asbestos: Homes built before 1980 may have asbestos in old vinyl tile, sheet flooring, or mastic. Test before you sand, scrape, or demolish. If the test is positive, hire a licensed abatement contractor.
- Lead paint: In pre-1978 homes, follow EPA RRP lead-safe rules when disturbing painted surfaces such as baseboards and trim.
- Gas and electrical: Moving a gas range, extending a gas line, or adding a circuit for radiant heat requires a licensed pro and a permit. Never DIY gas work.
- Dust: Cutting tile and grinding concrete create fine dust. Wear an N95 respirator or better, eye protection, and hearing protection. Cut outside when you can.
- Product safety: Look for low-VOC products and check for FloorScore certification or CARB Phase 2 compliance on composite floors. Air out the room for a day after install.
- Codes: Follow the International Residential Code for subfloor and stair rules, and keep smoke and carbon monoxide detectors working during any renovation.
How to Hire a Kitchen Flooring Contractor
Get three written bids that list the same line items: materials, labor, prep, removal, and trims. Ask these six questions:
- Are you licensed and insured for flooring work in this state, and can I see the certificates?
- How many kitchen floors of this exact material have you installed in the last year?
- What does your moisture testing and subfloor prep include, and what does it cost if the subfloor needs leveling?
- Do you disconnect and reconnect appliances, and is leak testing after reconnection included?
- What is your warranty on labor, separate from the product warranty?
- What is the payment schedule, and what exactly triggers the final payment?
Red flags: cash-only pricing, no written contract, pressure to sign today, a bid far below the others, no insurance, no local references, or a contractor who says moisture testing is unnecessary. Verify any license through your state contractor license board lookup before you sign. Search for your state name plus contractor license board to find the official lookup page.
Financing Your New Kitchen Floor
A kitchen floor is one of the smaller renovations, and many homeowners pay cash. If you need financing, these are the common options, in general terms:
- Cash or savings: Simplest and cheapest. No interest, no paperwork, no lien on your home.
- Home equity line of credit, HELOC: A revolving line secured by your home equity. You draw what you need and pay interest only on what you use. Rates are variable.
- Home equity loan: A lump sum secured by your home equity, repaid in fixed monthly payments. Rates are usually fixed.
- Cash-out refinance: Replaces your mortgage with a larger one and gives you the difference in cash. It makes sense only if the new mortgage terms work for you overall.
- Personal loan: Unsecured, fast to arrange, and usually carries a higher rate than home-secured options. Best for small projects you can repay quickly.
This is general information, not financial advice. Compare total costs, not just monthly payments, and never borrow more than the project needs.
Frequently Asked Questions
What is the best flooring for a kitchen?
For most kitchens, SPC luxury vinyl plank is the best overall pick: waterproof, comfortable underfoot, affordable, and fast to install. Porcelain tile is tougher and lasts longer, but costs more and feels hard and cold. Engineered hardwood wins on looks and resale value but needs more care around water.
Is vinyl plank flooring good for kitchens?
Yes. Rigid-core vinyl plank is 100 percent waterproof through the core, so spills and slow leaks will not swell it. Buy a 20 mil or thicker wear layer for a kitchen, and avoid installing it under heavy cabinets, since floating floors need room to expand.
Is tile or vinyl better for a kitchen floor?
Tile is better for maximum durability, stain resistance, and radiant heat. Vinyl is better for comfort, budget, and fast installation. Tile costs roughly double to install. If you cook for long stretches, vinyl is kinder to your back. If you want a floor you never replace, tile wins.
Can you put hardwood in a kitchen?
Yes, if you choose engineered hardwood and wipe up spills promptly. Solid hardwood is riskier because one unnoticed leak can cup the boards. Keep a mat at the sink and dishwasher, and never let water stand on any wood floor.
What flooring is most waterproof for a kitchen?
Porcelain tile with sealed grout and SPC vinyl plank are the most waterproof options. Tile itself is waterproof, but grout can absorb stains if it is not sealed. Vinyl plank has no grout, so its whole surface is waterproof, but water can still reach the subfloor at unsealed edges.
How long does it take to replace a kitchen floor?
A vinyl plank or laminate kitchen floor usually takes 1 to 2 days to install, plus a day for removal and appliance moves. Tile takes 2 to 4 days plus grout curing time. Hardwood takes 2 to 5 days. Add acclimation time, 48 to 72 hours, before installation starts.
Bottom Line
For most kitchens, SPC vinyl plank is the smart buy: waterproof, comfortable, affordable, and installed in a weekend. Choose porcelain tile if you want the toughest floor you will ever own and do not mind the hard surface and higher install cost. Choose engineered hardwood if the kitchen flows into wood floors and resale value matters most. Whatever you pick, test the subfloor, leave the expansion gap, and leak-test the dishwasher before you call the job done. For the full price table across every material, see our flooring cost per square foot guide, and compare materials side by side in our hardwood vs. laminate vs. vinyl plank comparison.
Get 3 quotes: Tell each contractor your floor type, kitchen size, and whether old flooring and appliances need handling, then compare the six line items side by side. Ready to start? Contact RenovationGuideHQ and we will point you to the right questions for your project.