
By Renovation Guide HQ · Updated October 20, 2026
Updated: October 2026
Disclosure: this guide contains no affiliate links — Renovation Guide HQ earns nothing from any products mentioned here.
Quick Answer
Professionally installed laminate flooring costs $3 to $13 per square foot in 2026, materials included. A 12-by-12 room typically runs $430 to $1,870. Materials alone cost $1 to $5 per square foot, and labor adds $2 to $3. DIY saves the labor: most bedrooms take a weekend. For the full picture of how laminate compares to other hard surfaces, see our flooring cost per square foot guide.
1. Laminate Flooring Installation Cost in 2026
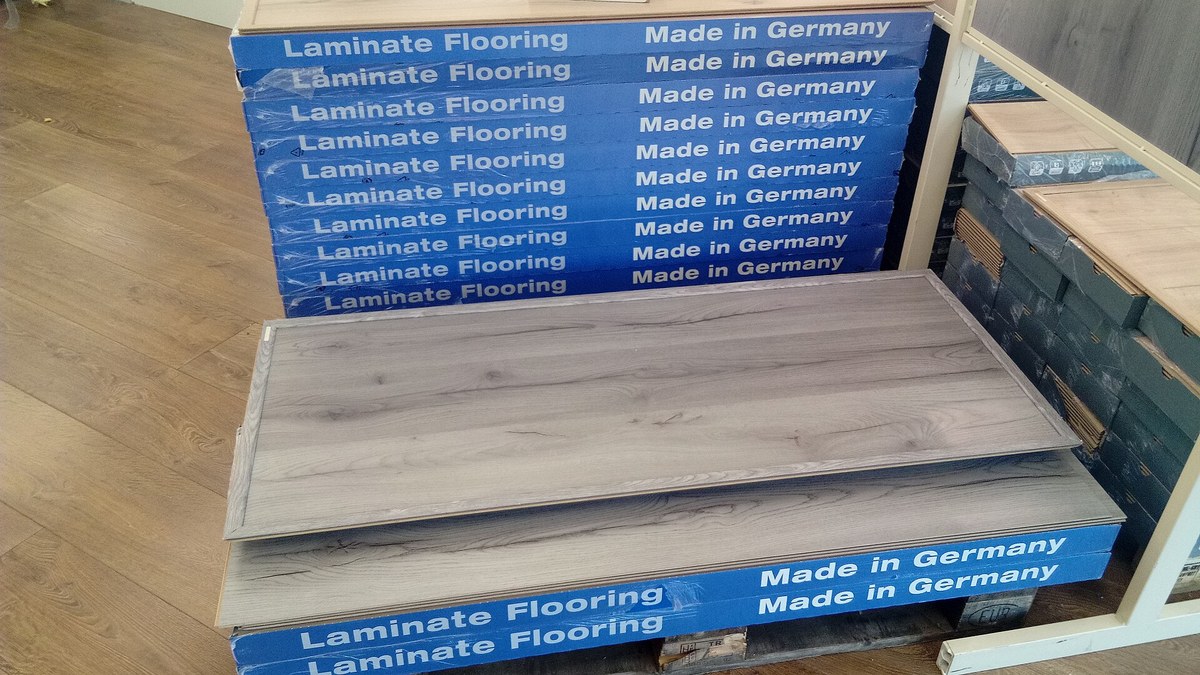
Laminate is a layered floor: a printed design layer over a high-density fiberboard core, sealed with a wear layer. It snaps together with click-lock edges and floats over the subfloor — no glue, no nails. That floating design is what makes it fast to install and one of the most DIY-friendly floors available.
| Tier | Installed cost per sq ft | 200 sq ft project | Labor share of total | Timeline (200 sq ft room) |
|---|---|---|---|---|
| Budget DIY — 7 mm planks, basic foam underlayment, you install | $3–$5 | $600–$1,000 | 0–25% | 2 days hands-on, plus 48-hour acclimation |
| Mid-range pro install — 10–12 mm planks, standard pro labor | $5–$8 | $1,000–$1,600 | ~30–40% | Pro finishes in about 1 day |
| Premium — 12 mm AC5 planks, stairs, angles, removal included | $8–$13 | $1,600–$2,600 | ~35–50% | 1–2 days pro |
Labor makes up roughly 30% to 50% of a flooring job, and materials run 50% to 70% of the installed total (VettedQuote 2026). Professional labor for laminate runs $2.00 to $3.00 per square foot per Home Depot pricing, and laminate floors last 10 to 25 years.
2. Worked Budget Example: 12×12 Bedroom (144 Sq Ft), Pro Install
Plank, underlayment, and labor prices below sit inside the sourced ranges above; quarter-round, transitions, and removal are marked (planning estimate).
| Line item | Math | Cost |
|---|---|---|
| Laminate planks, 12 mm mid-range (10% waste: 159 sq ft) | 159 × $2.50 | $397.50 |
| Underlayment, foam with vapor barrier | 144 × $0.35 | $50.40 |
| Professional labor | 144 × $2.50 | $360.00 |
| Quarter-round shoe molding (~60 linear ft) | 60 × $0.80 (planning estimate) | $48.00 |
| Transition strip at doorway | 1 × $15 (planning estimate) | $15.00 |
| Remove and haul old carpet | 144 × $1.00 (planning estimate) | $144.00 |
| Total | $1,014.90 |
That is $7.05 per square foot all-in — right in the middle of the $3–$13 installed range. Skip the carpet removal (doing it yourself) and the total drops to $870.90, or $6.05 per square foot.
3. Regional Cost Differences
Prices run 15% to 30% higher in the Northeast and on the West Coast than in the South. One regional pricing breakdown puts Northeast installations 10% to 20% above the national average. Figures below are illustrative planning ranges, not quotes.
| Region | Typical installed range (planning estimate) | Why |
|---|---|---|
| Northeast | $6–$10 per sq ft | Higher labor rates, dense metro demand |
| West | $6–$10 per sq ft | High wages on the coast; lower inland |
| South | $4–$7 per sq ft | Lower labor costs, more installer availability |
| Midwest | $4–$7 per sq ft | Competitive bids, lower overhead |
4. Seven Cost Factors With Real Dollar Impact
- Subfloor repair. Dips or humps beyond about 3/16 inch in 10 feet will stress click-lock seams (Opple House). Self-leveling compound and patching run about $50–$150 per room in materials (planning estimate), plus labor if a pro does it.
- Old floor removal. Carpet removal typically adds $1 to $2 per square foot (planning estimate); tile or glued-down vinyl demolition can cost more than the laminate install itself.
- Underlayment tier. Basic foam runs $0.30 to $0.40 per square foot; premium acoustic or cork underlayment can double that (planning estimate). Planks with a pre-attached pad skip this cost entirely.
- Pattern and layout waste. Budget 10% extra for straight layouts; diagonal or tile-look patterns with offset repeats need 15% or more (planning estimate) because cut-offs cannot be reused as freely.
- Stairs. This Old House advises against DIY laminate on stairs. Stair nosing pieces and pro labor can add several hundred dollars per flight (planning estimate) — hire this part out.
- Thresholds and trim. One transition strip per doorway at roughly $10–$30 each (planning estimate), plus quarter-round or new baseboard around the full perimeter.
- Small-room surcharges. Most installers price jobs under about 150 square feet at a higher per-foot rate or add a minimum trip charge (planning estimate) — the fixed setup time has to be covered.
5. DIY vs. Hiring a Pro
Laminate is one of the easiest floors for a DIYer — if you can measure, cut straight, and follow the expansion-gap rule, a bedroom is a one-day job (Jupps Floor Coverings). There is no electrical, gas, or structural work involved.
| DIY | Pro | |
|---|---|---|
| Skill level (1–5) | 2–3: basic measuring and sawing | N/A |
| Tools needed | Tape measure, saw, tapping block, pull bar, spacers, mallet (see tool list) | Installer brings everything |
| Time, 200 sq ft room | 8–12 hours hands-on, plus 48-hour acclimate | 3–5 hours hands-on |
| Savings | You keep the $2.00–$3.00 per sq ft labor — roughly $400–$600 on a 200 sq ft room | Faster, warranted workmanship |
| Permit / legal limits | Finish flooring usually needs no permit, but confirm with your city. In rentals and pre-1978 homes, a hired installer must follow EPA lead-safe rules — see Permits & Safety below. | |
DIY makes the most sense on single rectangular rooms with a flat wood subfloor. Hire a pro for stairs, multi-room open plans, badly out-of-level concrete slabs, or jobs full of angles and built-in cabinetry.
6. Step-by-Step Installation With Time Per Step
Times are for a 200 sq ft rectangular room, first-time DIYer, and marked (planning estimate).
- Acclimate the planks — 48 hours waiting, 30 minutes hands-on. Stack unopened boxes in the room where they will be installed for at least 48 hours (HGTV, ArticleCity). The fiberboard core adjusts to your home’s temperature and humidity; skipping this causes gapping or buckling later.
- Remove baseboards and old flooring — 2–3 hours. Pry baseboards gently if you plan to reuse them. Rip up carpet or old underlayment and vacuum thoroughly.
- Prep the subfloor — 1–2 hours. Sweep, then check flatness with a long straightedge. Target under 1/8 inch of variation over a 10-foot span (SleepBloom). Grind down humps; fill dips with leveling compound.
- Roll out underlayment — 45 minutes–1 hour. Lay foam or cork perpendicular to the plank direction, butt seams tight, and tape them. Over concrete, the underlayment must include a vapor barrier (Flooring Spokane).
- Plan the layout — 30 minutes–1 hour. Measure the room; make sure the last row will be at least 2 inches wide — if not, rip the first row narrower first (manufacturer-style instruction PDF). Decide plank direction: usually parallel to the longest wall or the main light source.
- Lay the first row — 30–45 minutes. Start on the longest, straightest wall with the tongue facing the wall. Cut the tongue off first-row planks and set 1/4-inch spacers every 12 inches (HGTV).
- Lay field rows — 4–6 hours. Angle each plank into the previous row and press down to click-lock it. Start each new row with the cut-off from the last row so end joints stagger at least 12 inches (ArticleCity). Pull planks from several cartons at once so the print pattern looks random. Use the tapping block and pull bar — never hammer directly on a plank edge.
- Cut around doorways and obstacles — 1–2 hours. Undercut door jambs with a jamb saw so planks slide underneath. Notch planks around pipes and vents, keeping the 1/4-inch expansion gap at every fixed object.
- Install transitions — 30 minutes each. Use T-moldings at doorways and wherever a run exceeds about 33 feet (install instructions).
- Remove spacers; install quarter-round — 2–3 hours. Nail quarter-round to the baseboard, never into the floor (HGTV), and caulk where trim meets the wall.
Total hands-on time: roughly 12–17 hours spread over two days (planning estimate), not counting the 48-hour acclimation wait.
7. Materials & Tools
Materials:
- Laminate planks — room square footage plus 10% waste (15% for diagonal layouts)
- Underlayment — foam with attached vapor barrier for concrete; foam or cork for wood subfloors (This Old House)
- Underlayment seam tape
- Quarter-round or base shoe molding
- Transition strips / T-moldings
- Wood filler and touch-up marker in a matching tone (planning estimate item)
Tools:
- Tape measure and chalk line
- Laminate cutter or circular saw (a laminate cutter is quieter and dust-free; buying one costs roughly $50–$100, planning estimate)
- Tapping block and pull bar
- 1/4-inch spacers
- Rubber mallet
- Utility knife
- Jamb saw or oscillating tool for door frames
- Safety glasses, knee pads, ear protection, dust mask
Tool math: buying the specialty tools outright typically costs $100–$200 (planning estimate). On a small one-room DIY job that can eat a third of your labor savings — borrow or rent the laminate cutter if this is a one-time project.
8. Mistakes Contractors See Most
- Glueing or nailing the floor down. Laminate is a floating floor. Pinning it to the subfloor with adhesive or fasteners destroys the expansion system (LaminateFloors SA).
- Nailing quarter-round into the floor. Trim must be nailed to the wall or baseboard only, so the floor can move underneath (HGTV).
- Skipping acclimation. Floors installed straight off the truck gap or peak weeks later (Flooring Spokane).
- Tight perimeters. The 1/4-inch expansion gap must run around the entire floor — walls, pipes, door frames. It is the single biggest cause of buckled floating floors (Opple House).
- Poor staggering. End joints closer than 12 inches apart telegraph through the floor and weaken the locking system. Never use cut pieces shorter than 12 inches (ArticleCity).
- Wrong underlayment over concrete. Standard foam without a vapor barrier lets slab moisture attack the fiberboard core (Flooring Spokane).
- Forcing misaligned locks. Hammering planks together that do not seat easily damages the locking profile — check for debris or a crooked row instead (Flooring Spokane).
- Not planning the last row. Ending with a sliver row under 2 inches wide looks bad and refuses to lock properly.
- Installing in the wrong rooms. Standard laminate dislikes moisture — keep it out of bathrooms and laundry rooms (This Old House). If you need water resistance, compare vinyl plank flooring costs instead.
9. Permits & Safety
Laminate installation itself almost never requires a building permit — it is a finish surface, not structural, electrical, or plumbing work (confirm with your city’s permit office). Three safety items still matter:
- Lead paint (pre-1978 homes). If your project disturbs painted surfaces — scraping old paint during prep, for example — anyone you pay to do the work must be an EPA Lead-Safe Certified firm under the Renovation, Repair, and Painting Rule.
- Asbestos in old flooring. Some pre-1980 vinyl tile, sheet vinyl, and black cutback adhesives contain asbestos. Never sand, scrape, or rip up suspect material on a guess — have it tested first (testing cost is a planning estimate; arrange through a local environmental testing lab).
- Physical protection. Knee pads for the long hours on the floor, safety glasses and ear protection when cutting, and a dust mask when sawing laminate.
10. Hiring a Contractor: 6 Questions, Red Flags, and License Checks
Ask these six:
- How many laminate installations did you complete in the last 12 months?
- What underlayment do you recommend for my subfloor type — wood or concrete?
- How do you maintain the expansion gap, and what transition pieces do you use at doorways?
- What flatness tolerance do you require, and how do you fix a subfloor that fails it?
- Do you handle baseboard removal, reinstallation, and paint touch-up, or is that on me?
- What is your labor warranty, and does it cover seam separation or buckling from installation error?
Red flags: a quote far below the others (corners get cut on underlayment), no mention of acclimation or expansion gaps, cash-only pricing with no written contract, or reluctance to name the underlayment brand.
License check: flooring contractors are licensed at the state level — look up the company on your state contractor license board before signing anything. In pre-1978 homes, also confirm EPA RRP certification.
11. FAQs
How long does laminate flooring last?
10 to 25 years, depending on AC wear rating, traffic, and moisture exposure. AC3 suits bedrooms; AC4 or AC5 suits hallways, kitchens, and busy family rooms.
Can you install laminate over existing tile or vinyl?
Yes, if the old surface is flat, clean, firmly bonded, and dry. Do not install over carpet or cushioned vinyl. One caution: old vinyl tile or sheet flooring installed before 1980 may contain asbestos — test it before ripping anything up.
Do I need underlayment if my planks have an attached pad?
Usually not — doubling up can make the floor too soft and stress the locks. Over concrete, you still need a separate 6-mil vapor barrier under the planks even with an attached pad.
Can laminate flooring go in a bathroom or laundry room?
Standard laminate is a poor choice for wet rooms. Water-resistant laminate lines exist, but the laminate vs. vinyl plank comparison shows vinyl plank is the safer pick where water is a daily risk.
How long does laminate need to acclimate?
At least 48 hours in the installation room, in unopened boxes, with the home’s normal temperature and humidity (HGTV). Some manufacturers specify up to 72 hours — follow your product’s instructions.
Why is my laminate floor buckling?
Almost always one of three causes: no expansion gap at the perimeter, skipped acclimation, or moisture from below (Flooring Spokane). A buckling floor usually has to be partially lifted and reinstalled — it rarely settles back down on its own.
12. What $800 / $2,000 / $5,000 Actually Buys
$800 (planning estimate): a DIY 10×12 bedroom with budget 7 mm planks — materials and underlayment, your weekend, done. Or a pro install on a very small room where you supply the flooring.
$2,000 (planning estimate): a pro-installed 200–250 sq ft living room with mid-range 12 mm planks, underlayment, trim, and old-floor removal included.
$5,000 (planning estimate): a pro-installed 700–900 sq ft main level with quality planks and new baseboards — or two to three bedrooms with premium AC5 flooring throughout.
13. Financing the Project
Laminate is one of the cheaper floors to install, so many homeowners pay cash. For larger multi-room projects, common options include a home equity line of credit (HELOC), a home equity loan, a cash-out refinance, or a personal loan. Each has different repayment terms and qualification rules — this is general information only, not financial advice. Compare the total cost of borrowing against simply phasing the project room by room.
Bottom Line
Laminate flooring gives you a hardwood look at $3 to $13 per square foot installed, and its floating click-lock system makes it the friendliest DIY floor in the aisle. Budget for acclimation time, a real expansion gap, and the right underlayment for your subfloor, and the floor will stay flat for decades. Weighing laminate against real wood? Our hardwood floor installation cost guide lays out the price gap. For the full cost landscape, revisit our flooring cost per square foot pillar guide — then get 3 quotes from local installers before you buy a single box.
Related guide: Laminate is a popular pick below grade; see how it fits a whole-project budget in our basement finishing cost guide.